


I just completed my engineering in electronics and communication. Unfortunately, I’m not a great fan of electronics. Most people in my batch chose IT as a career, but it really didn’t interest me. I was totally confused. Later in my 4th year of engineering, I came across digital marketing.
The more I read, the more I started loving it. Picked up few online courses and started learning a lot about it.
Quick tip – Online marketing fundamentals certification by Google is the great place to start learning and get the basic understanding of entire digital marketing.
Finally, I decided to start my career in digital marketing.
Applied for a few jobs and got one at “CustomerLabs” – A Product based company which helps digital marketers to improve their productivity.
My first 5 days as a digital marketer
Day 1: Setting up a Shopify store
I was asked to create a sample Shopify store and add a few products to it. I managed to learn and do it quickly as It wasn’t a big deal.
“Shopify allows you to set up an online store to sell goods. Without knowing to code. With this platform, you can easily build a professional looking online store. Set up themes and add products and much more with just click of a button.”
On knowing Shopify is paid platform and I should add the credit card to get a free trial. I made a quick google search if I could start one for free.
Guess what?
With Shopify developers account, I actually create a store for testing purposes.
Day 2: Adding Google Analytics to Shopify store
Setting up Google Analytics with my Shopify store was easier than I thought. In order to integrate it with my store, all I need is the tracking code from Google Analytics.
I could find my tracking code from Analytics by visiting settings in admin panel-Tracking info-Tracking code and here is my website tracking code.

I have to now paste the above code into my Shopify store.
In order to do that I visited my Shopify admin panel, towards my left dashboard-Online store-Preference-Google Analytics column, where I need to insert my code.

Clicked save, Google Analytics finally installed with my store.
To test this, I visited my Shopify store in a new window and also with my mobile.
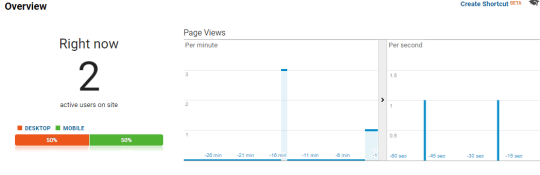
Now, I could successfully track my Shopify store page views with google analytics. Finally, Google Analytics and Shopify integration are done, well that’s what I thought.
Day 3&4: Integrating my Shopify with Google Tag Manager
After trying Google Analytics, I was asked to integrate Shopify with Google Tag Manager which I was completely unaware of.
“Google Tag Manager is a free tool that makes it easy for marketers to add and update website tags which includes conversion tracking, site analytics, remarketing, and much more”
I started learning about it. At first, it was quite complicated. After some time, It became much complicated.
Google Tag Manager provides two sets of unique code.

I went to my admin panel of Shopify store. Clicked on online store from left dashboard
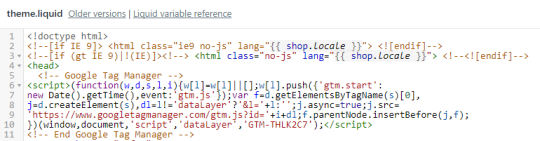
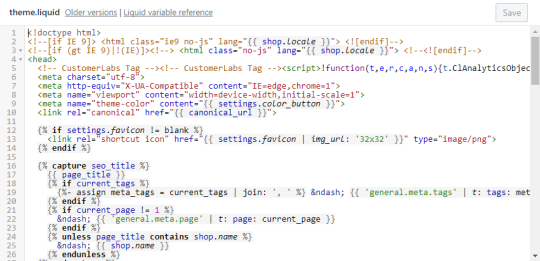
Themes-Actions-Edit HTML/CSS-Layouttheme.liquid and pasted the code there.
I inserted the code which is specified for head and the body after the <head> and <body> tag respectively.
As shown below.

I thought it is all set. I was waiting for something to happen. But it didn’t. I tried testing it with a new browser and even with my mobile. All I thought was, if I click on add to cart on my sample product, I could simply track my events with Google Tag Manager. It simply didn’t work in that way. I started looking for videos and blogs to learn more.
In order to set up an event tracking with Google Tag Manager. I have to learn about Tags, Triggers, Variables, Data layers and much more.
Tags – Snippet of code, usually “javascript code”.
Triggers – Defines when and where tags are executed.
Variables – Used to receive or store information to be used as tags and triggers.
I spent several hours on understanding the concepts of how data layer in Google Tag Manager.
Concepts of tracking events using GTM looked pretty difficult. But, I didn’t get the data I was expecting, which is “ADD TO CART” to my sample product’s page. Finally, I was fed up with this task on google tag manager event tracking and I couldn’t track add to cart button on the Shopify store.
I was looking to see if I could find better integration software and I came across Segment. Damn, again I needed to go around the developers to configure add to cart event. I wondered if I could fix this without knowing to code.
By putting all my efforts for a couple of days. I couldn’t get what I was expecting. I have to admit to my team, that I was not successful with this task.
DAY 5: Tracking add to cart button on Shopify store with Action Recorder
Action Recorder lets you set up event tracking, without writing to code and sync the data event data with 100+ marketing tools.
Here is the step-by-step tutorial on setting up action recorder with Shopify store
1.Account setup
Setting up an account with action recorder is really easy, it just took me few seconds.
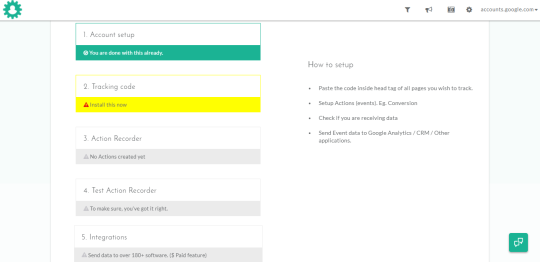
2.Installing tracking code on Shopify store
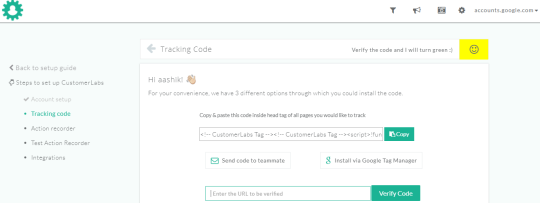
I got a unique code which I simply need to paste that code into my Shopify sample store.
On admin panel of my Shopify store, clicked on online store from my left dashboard went to ThemesActionsEdit HTML/CSSLayouttheme.liquid
I’ve posted my unique code under the <head tag>, post that I entered my store URL in Action recorder and clicked verify code.
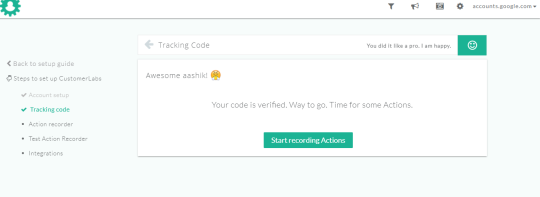
Got this message, my account is verified.
3. Setting up add to cart tracking on Shopify store
Now, I’m going to record my first action.

In my case, I wanted to record “ADD TO CART”. In order to track my conversions. Clicked on the hand pointing symbol and selected the event element I wanted to track on the Shopify store. As shown below.

Next step is selecting the attributes. I need the name and price of the particular product which has been sent to Google Analytics and I choose accordingly.

.
I want to track my “ADD TO CART” event for all the products in my pages.so that I could get the name and price of all the products that have been added to cart.

That’s it. I have set up tracking for add to cart event.
4. Test action recorder
In order to test this I opened my Shopify store in a new browser and to test my event is working fine when I clicked on the add to cart button.
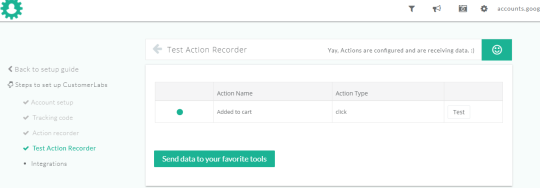
Now, coming to action recorder I clicked on the test.
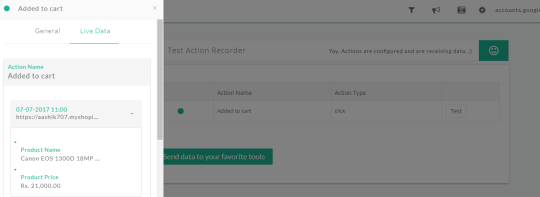
On clicking test, I could actually get the exact information of the product which I clicked on “ADD TO CART”. And yes, my Shopify tracking works great with action recorder.
5. Sending events to Google Analytics using Action Recorder
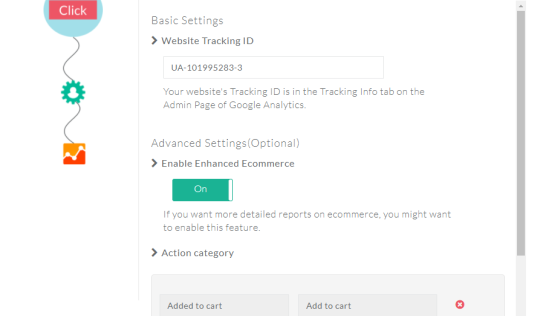
In order to Customize Google Analytics with action recorder, I needed to follow these steps.

1) Pasted my Google Analytics Tracking ID
2) Enabled enhanced E-commerce setting
3) I set my action category as “Added to cart”
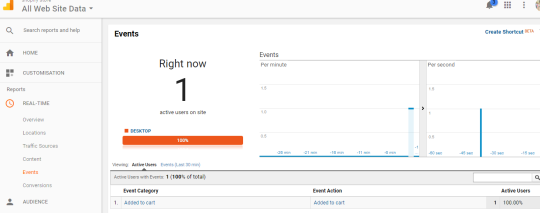
Finally, my Shopify store is ready with Google Analytics Integration. Now I could track all my events data in Google Analytics.
My next task next task is to setup WooCommerce event tracking and Integrate Facebook with it.
Stay tuned…
What do you think? Try Action Recorder, if you need any help do let me know. Happy to help you.
