Customerlabs Support Docs
Explore our documentation to quickly get started
-
CDP Core Concepts
-
Destinations
- CustomerLabs + BigQuery Integration
- CustomerLabs + Facebook Custom Audiences
- CustomerLabs + Gist (ConvertFox) Integration
- CustomerLabs + Google Adwords Integration
- CustomerLabs + Google Analytics Integration
- CustomerLabs + Google Sheets Integration
- CustomerLabs + Intercom Integration
- CustomerLabs + Mixpanel Integration
- CustomerLabs + Segment Integration
- CustomerLabs + Webhooks Integration
- CustomerLabs CDP + Customer.io integration
- CustomerLabs CDP + Drip Integration
- CustomerLabs CDP + Zapier Integration
- Show all articles ( 3 ) Collapse Articles
-
Events Configuration
- Documents
-
Getting Started
-
Segmentation
-
Sources
-
Website Event Tracking
-
Changed log
Salesforce Integration with No-code CDP
Source – Salesforce
(A ‘Source’ platform is one where data can be brought in from any platform into CustomerLabs CDP)
Salesforce is a customer relationship management (CRM) platform helping organizations effectively streamline their sales and marketing operations.
Marketing teams connect Salesforce with CustomerLabs CDP to send their Accounts, Contacts & Opportunity related information to create unified customer profiles in CustomerLabs CDP and sync the enriched customer data to all their favorite tools in their tech stack.
Here are some popular CRM growth tactics that marketers run with Salesforce data using CustomerLabs CDP.
Getting started
Rather than making an API call when an event happens in a connected account, Salesforce will send an HTTP request to CustomerLabs CDP via webhook. The below steps will help you integrate Salesforce as a Source with your CustomerLabs CDP account without writing any code.
Log in CustomerLabs > Sources
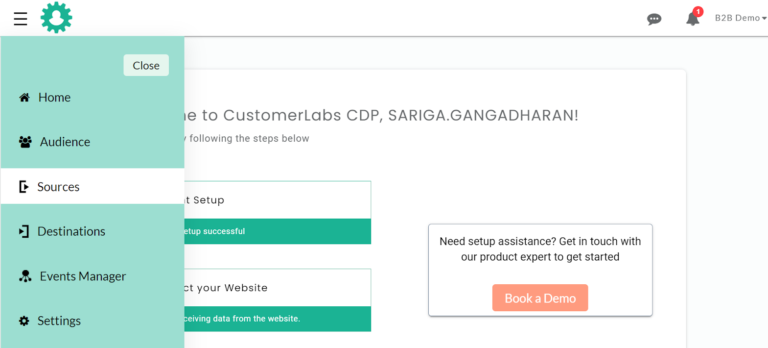
2. Click on connect source,
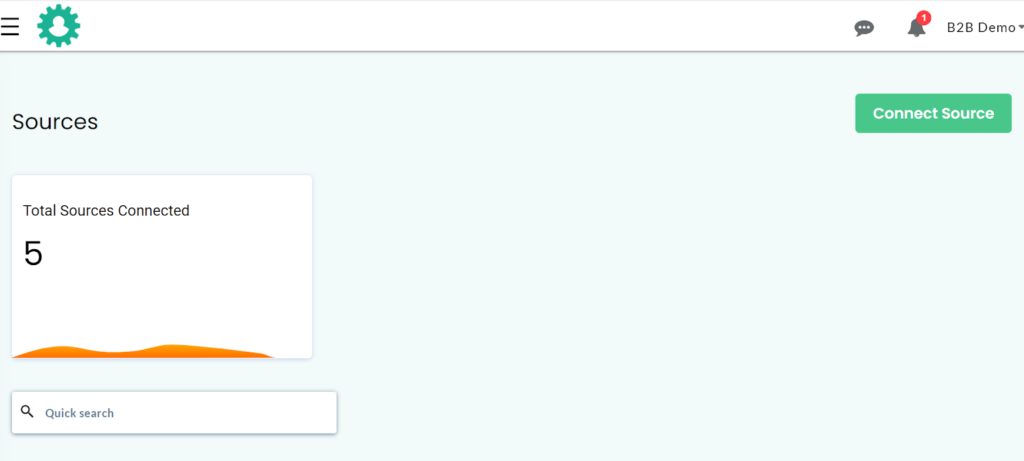
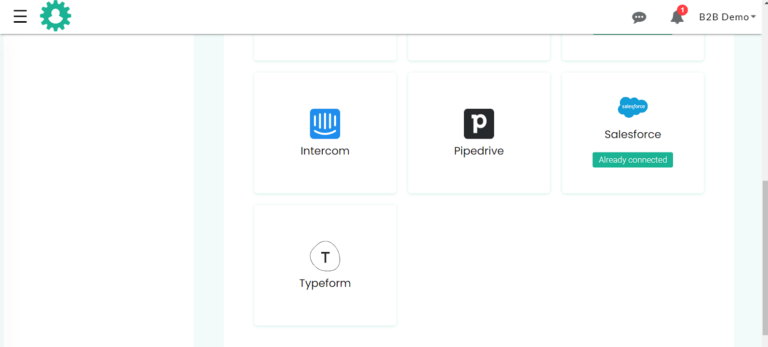
3. Select Salesforce from the list of sources
4. Click the Authenticate Salesforce button

5. You will be redirected to your Salesforce account
6. Choose the account you want to integrate with.
7. And now, salesforce and No-code CustomerLabs CDP are connected.
Module Configurations
After authenticating Salesforce, select the modules and configure them to let the relevant data pass through salesforce.
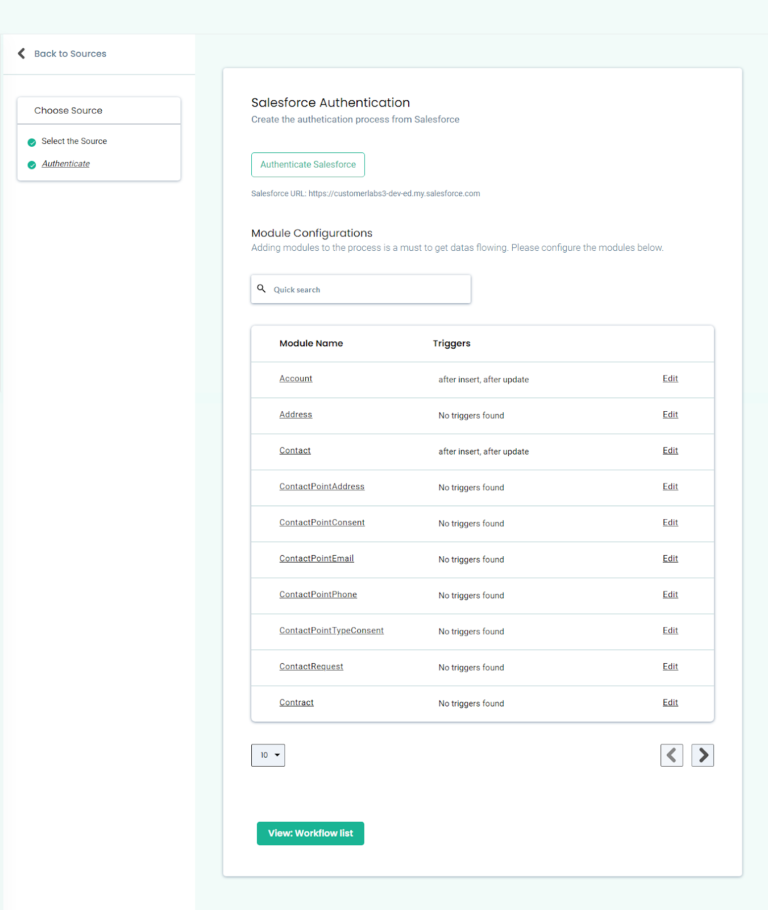
Here we have selected Account, Contact, Lead and Opportunity as modules and have configured them .
Here’s an example on Account configuration set up below
– Click the account module’s edit button and select the event through which you’d like to pass the data
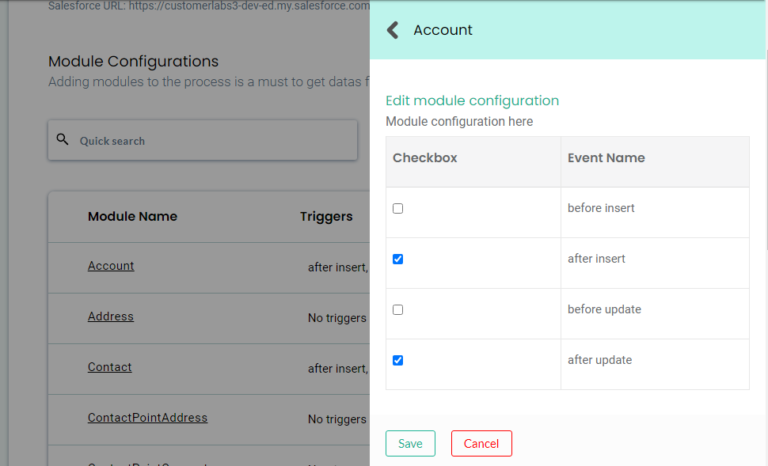
Likewise, configure the rest of the modules as per your requirements.
Workflow #1 – How to send data to CustomerLabs CDP when a new contact is created in Salesforce
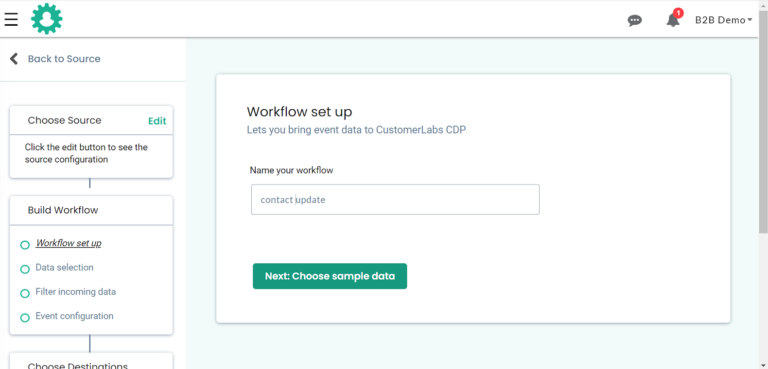
1. Give a name to your workflow and before proceeding, Create a test contact in Salesforce to get related data samples. Once a new contact is created, click on ‘Choose sample data.
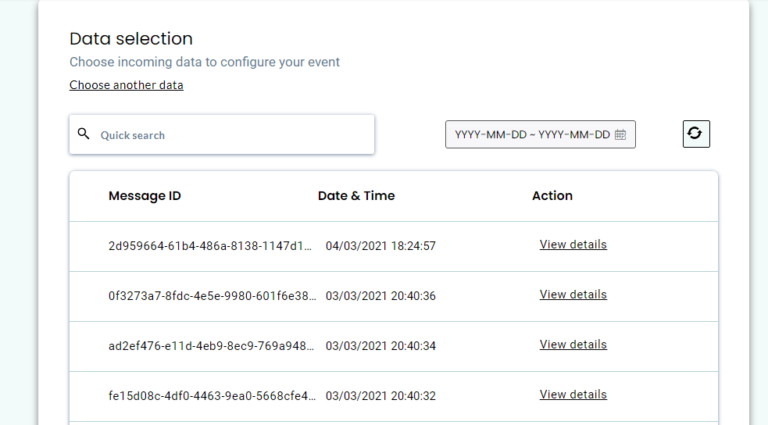
2. View relevant sample data in CustomerLabs CDP.
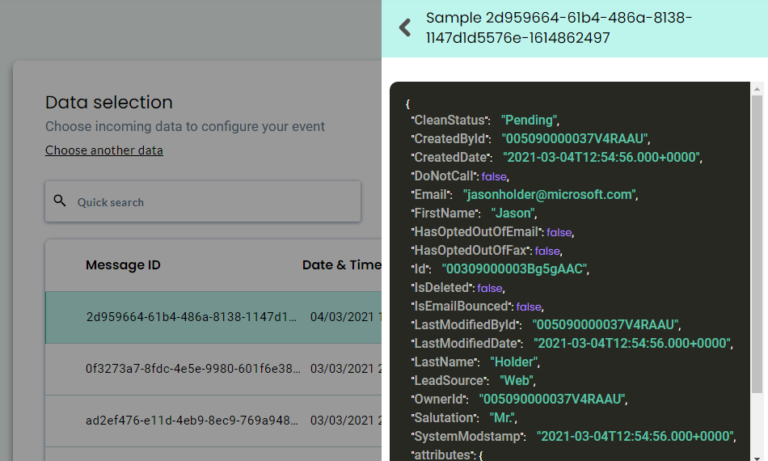
3. Click on view data to know more about incoming information. In the case of Salesforce, all incoming contact fields will be sent in the same set. You can find only the First name, Last name, contact email here. But the common user ID parameter here will be the contact id.
4. Once the sample data is selected. Now click “Filter incoming data”

5. The filter screen acts as a roadblock to stop other non-related event data coming in from Salesforce & skew existing information
6. Click on ‘Create filter criteria’ to give your filter condition – this will allow only ‘contacts’ event from Salesforce to enter this workflow in the future.
7. Choose the event type from the dropdown
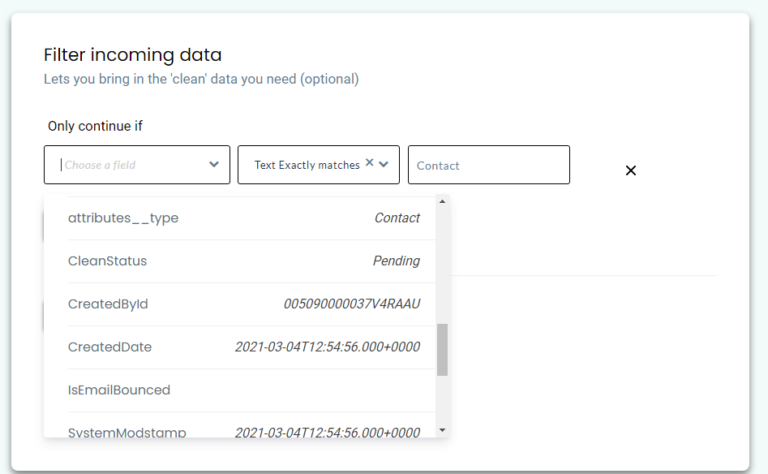
8. Add condition. Make sure to give the event name as it is shown in the sample data and click event configuration
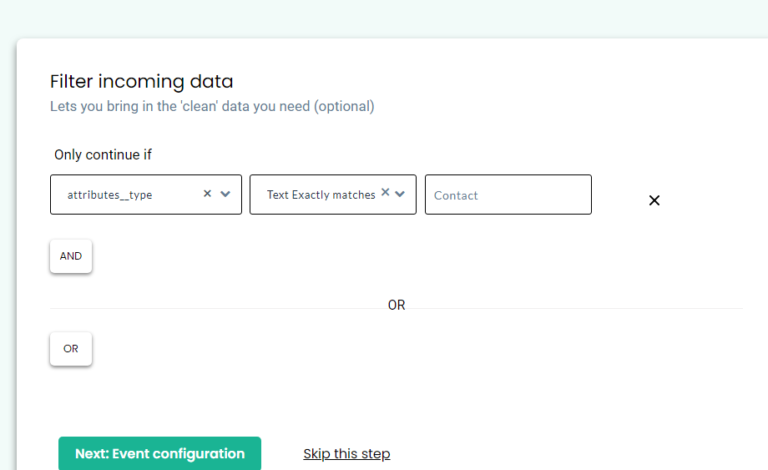
9. Give a name to your incoming event. You can select a predefined event name as shown below or give a custom name based on your requirements.

10. User Identity mapping lets you combine all user-related events, since an incoming contact has an email address & is assigned a Salesforce ID we can select two identifiers (Identify_by_email and user_id) from the drop down and assign relevant values.

11. Click on +Add new to add the next condition

12. Once the user mapping is done, you can categorically map other incoming information into the following buckets

13. Here we have added first name, email, and salesforce id as additional information to enrich the user profile
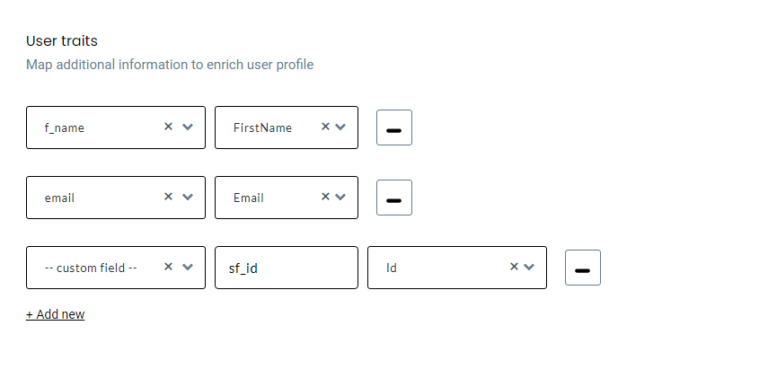
Workflow #2 – How to send data to CustomerLabs CDP when a new account is created in Salesforce
The below steps explain how you can filter and map incoming account information from Salesforce to Customerlabs CDP
1. Give a name to your workflow and before proceeding, Create a test company in Salesforce to get related data samples. Once a new contact is created, click on ‘Choose sample data.

2. View relevant sample data in CustomerLabs CDP.
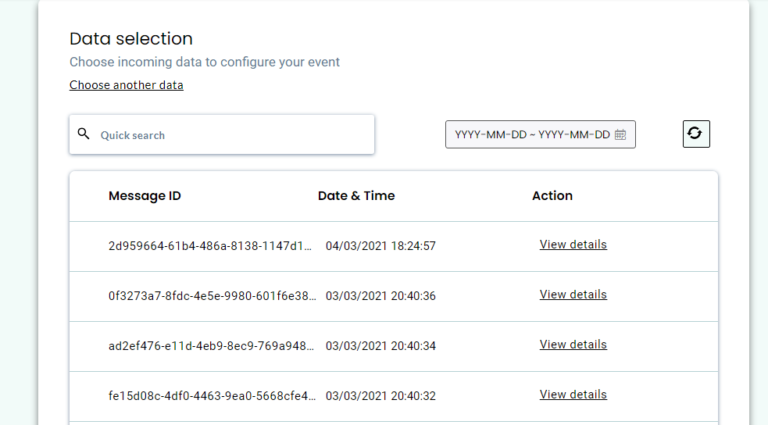
3. Click on view data to know more about incoming information. You can find the type data “account” in the sample below and the common user ID parameter here will be the account id.
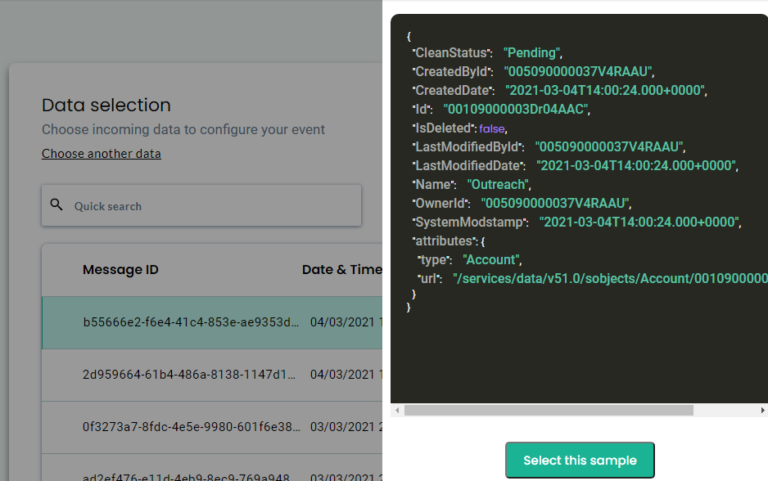
4. Once the sample data is selected. Now click “Filter incoming data”

5. The filter screen acts as a roadblock to stop other non-related event data coming in from Salesforce & skew existing information
6. Click on ‘Create filter criteria’ to give your filter condition – this will allow only ‘accounts’ event from Salesforce to enter this workflow in the future.
7. Choose the event type from the dropdown

8. Add condition. Make sure to give the event name as it is shown in the sample data.
And click event configuration
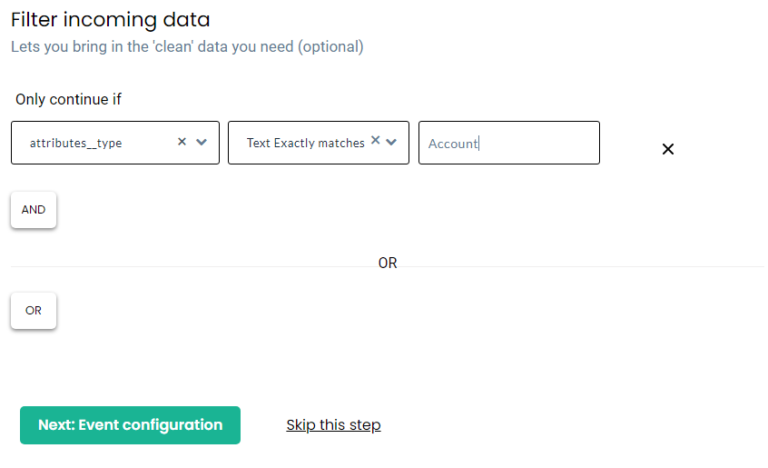
9. Give a name to your incoming event. You can select a predefined event name as shown below or give a custom name based on your requirements

10. User Identity mapping lets you combine all user-related events, since an incoming account has a name & id assigned a Salesforce ID we can select two identifiers from the drop-down and assign relevant values.

11. Once the account mapping is done, you can categorically map other incoming information into the following buckets
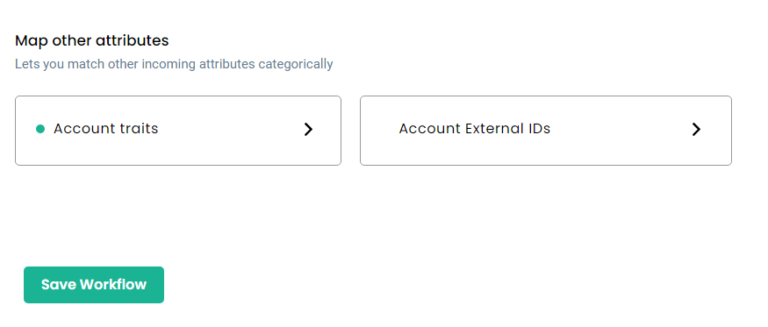
12. Here we have added first name, email, and salesforce id as additional information to enrich the account profile
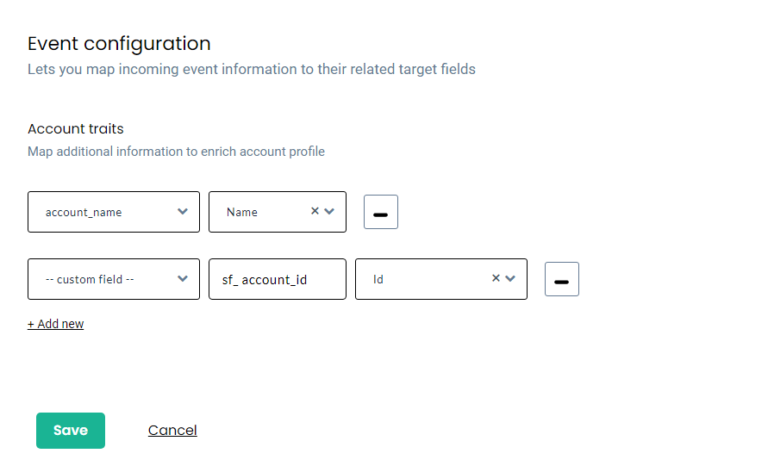
Workflow #3 – How to send data to CustomerLabs CDP when a new account is created in Salesforce
1. Give a name to your workflow and before proceeding, Create a test opportunity in Salesforce to get related data samples. Once a new opportunity is created, click on ‘Choose sample data
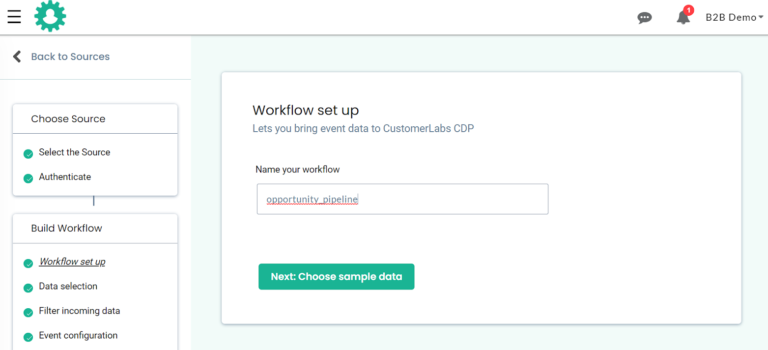
2. View relevant sample data in CustomerLabs CDP
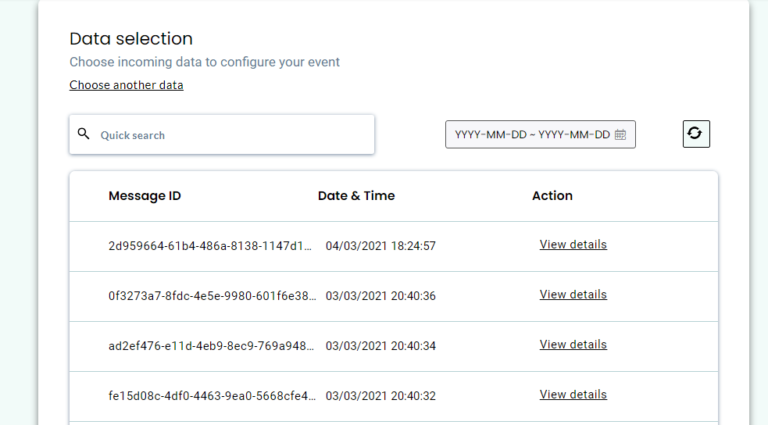
3. Click on view data to know more about incoming information. You can find the type data “opportunity” in the sample below and the common opportunity ID parameter here will be the account id.
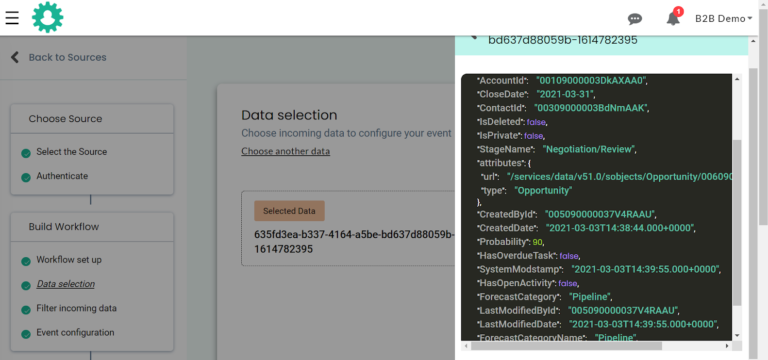
4. Once the sample data is selected. Now click “Filter incoming data”

5. The filter screen acts as a roadblock to stop other non-related event data coming in from Salesforce & skew existing information
6. Click on ‘Create filter criteria’ to give your filter condition – this will allow only ‘accounts’ event from Salesforce to enter this workflow in the future.
7. Choose the event type from the dropdown. Make sure to give the event name as it is shown in the sample data and click event configuration
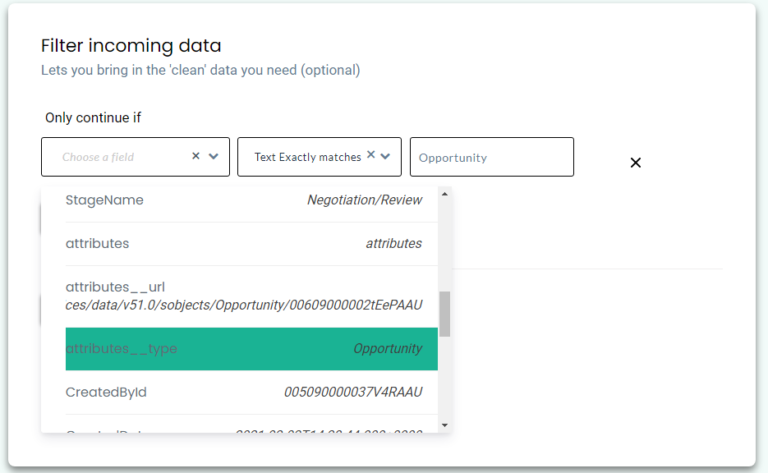
8. Give a name to your incoming event. You can select a predefined event name as shown below or give a custom name based on your requirements

9. User Identity mapping lets you combine all user-related events, since an incoming oportunity event data has name & and id. we can select two identifiers from the drop down and assign relevant values
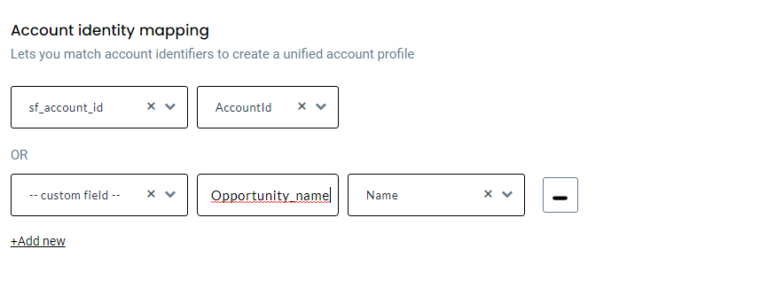
10. Once the account mapping is done, you can categorically map other incoming information into the following buckets
11. Here we have added account name, stage name, and opportunity id as additional information to enrich the account profile
This will enable the CDP to associate all opportunity related informations assigned.
Destination
Send incoming data to third-party apps to boost marketing effectiveness. Learn more about the destination tools we support.
