


We are going to cover about FramerX Code Components
- Intro to Components
- Design Components
- Code Components
- React
- Creation
- Canvas
- Displaying the Canvas element
- Custom Properties
- Control Properties
- Code Overrides
- Events
- Animations
- FramerX Store
1. Intro to Components:
Components are the reusable, Interactive building blocks that can compose into larger ones to make up the entire screens and interface looks awesome.
2. Design Components:
You can create your design component by Right click in the layer and click, Create a New Component or press CMD + K to create a component that can be reused. The design components you see in the left side panel will be referred to as Master Components. If you duplicate the master component then it’s referred as Instance. Whenever you change anything in the master component will be reflected in all the Instances. To change the specific instance you can change in the instance itself and it will not reflect in the master component. Also, Right-click in the instance and click the Reset Overrides then it will revert the styling as in the master component.
3. Code Components:
Interactive components are the Code components which are written in React. You should have a basic knowledge of HTML/CSS/JavaScript to get started with the FramerX code components.
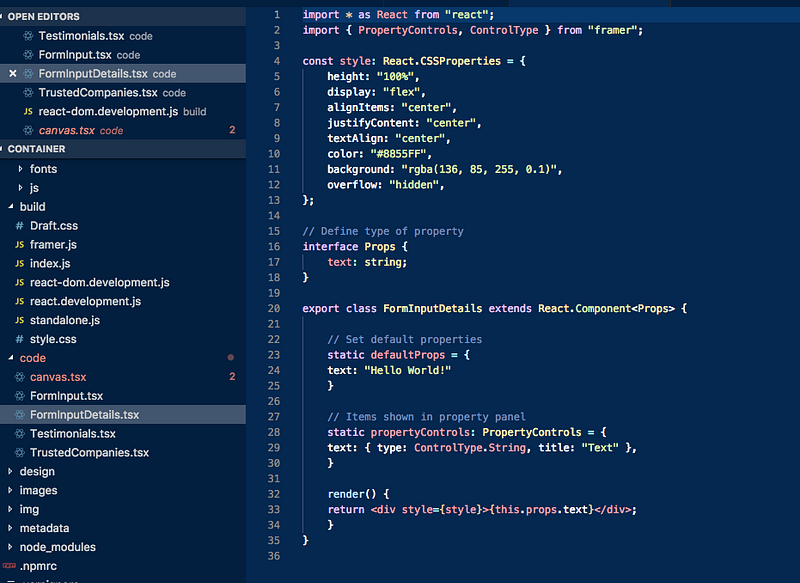
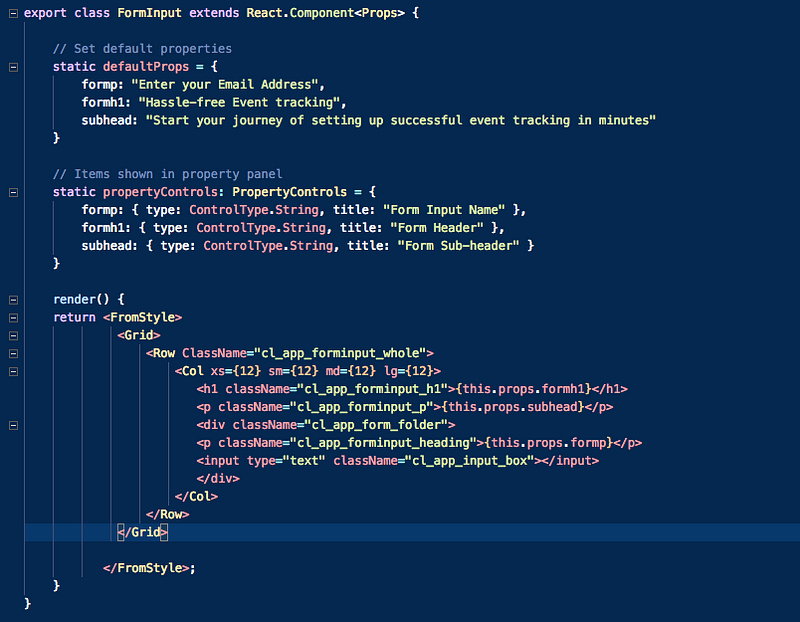
4. React:
React components use the JSX, an HTML-like markup language. In the Below example just check how the render() method returns something similar to HTML. You need to check with react.org docs to get started in React.
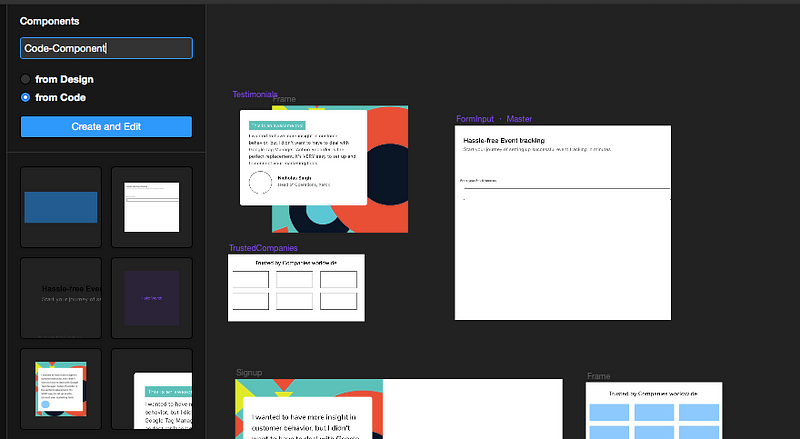
5. Creation:
To create a new code component, select the component tab and create a name of the component and select from code options and click edit code. FramerX relies on the external code editor installed. Mostly we recommend using Visual studio code by Microsoft.
6. Canvas:
Interactive components like scrolling and click handling will be paused to enjoy the functional aspect of the code component, but you can always test it by clicking the preview button on the top right corner and view on the preview window. Every component rendered in the canvas are wrapped inside the Frame.
7. Displaying the canvas element:
The Code will determine the contents and the styling of the component so you cannot directly edit the component from the canvas to edit, you need to work in the code editor and save it to see the changes in the component on canvas.
React Props are basically the attributes for the component to display. Some of those are a list of children or it’s content. You can import any components into the canvas.
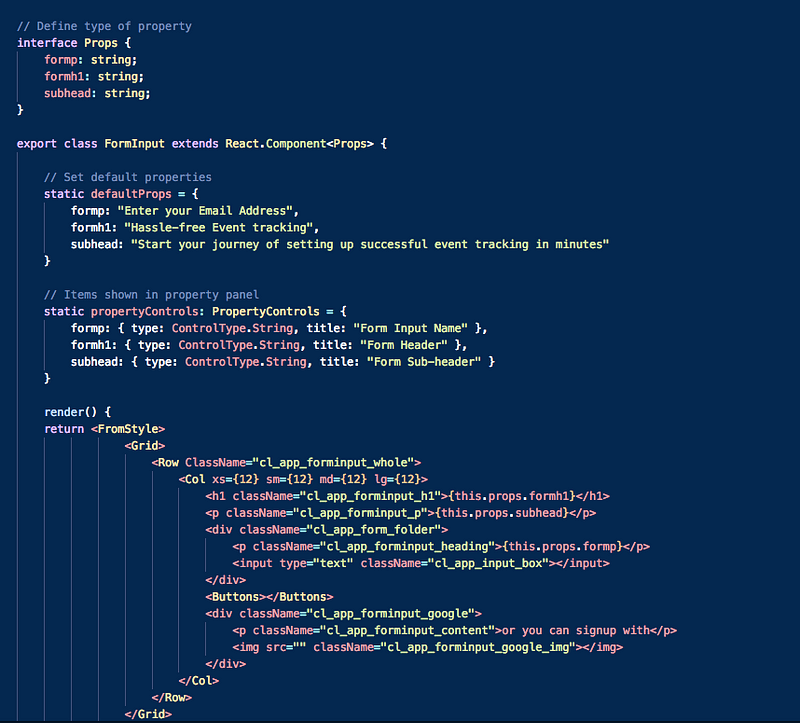
8. Custom Properties:
The Code components become exponentially stronger when you introduce the property control, which allows the user to customize the User interface of the components inside the properties panel of the FramerX itself. Which allows users to reduce tons of time which changing those in the Code components.
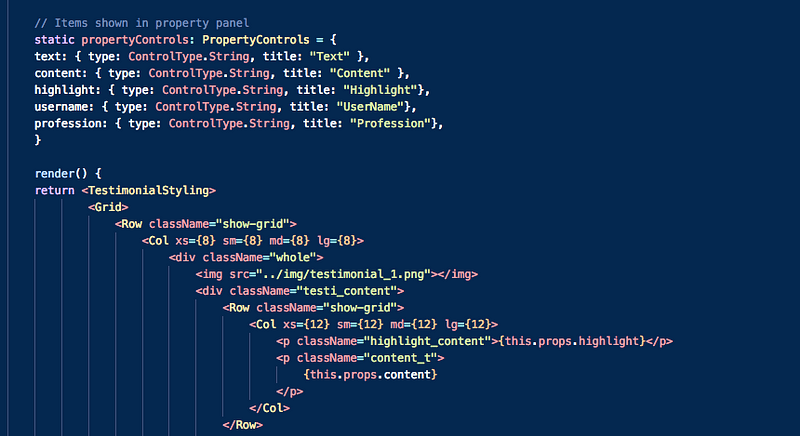
9. Control types:
Some of the Control types that are available in the FramerX Code components are:
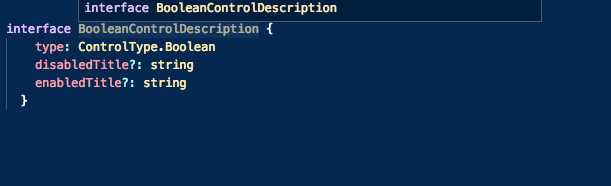
Boolean: — Boolean type uses the segmented controls.The segment title as in the name itself true or false by default. But you can override with EnableTitle and disableTitle.
Number — The numbers are displayed using an input field and a slider. The constraints using min and max values. The default value is 1. When a step smaller than 1 is entered, the output will be a float.

String- String controls are displayed with a single line input field. A placeholder value can be set if needed.

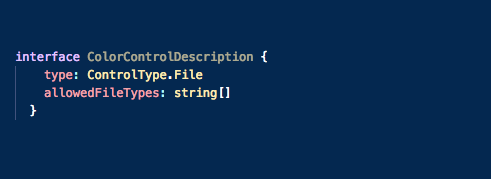
File- The File controls are displayed using the file picker that shows the name after selecting the file. This component receives an absolute URL. They can allow files like JSON, Object, etc.
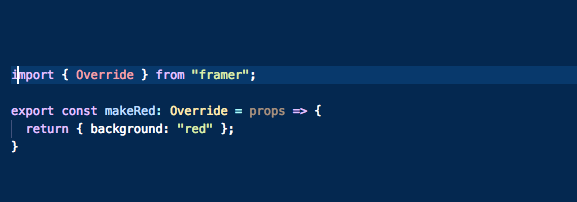
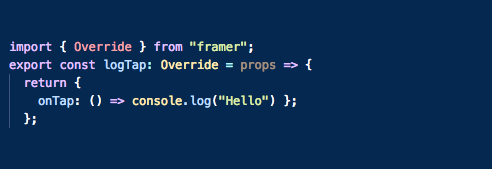
10. Code Overrides:
By using code overrides you can add animations and interaction to any frames and helps to communicate between different components. It is a simple Javascript function that is used to communicate between different components. You can write yourself and apply it to your component and the frame. These functions can override the properties such as opacity, fill and other interactions and the animations you specify.
The Code override lives in your code editor and you can find it when you mention import override in the file.
11. Events:
For any interactions to happen you need events. Events are things that happen on click, tap, swipe and so on. These events consist of types and a handler with code that needs to be run the when the event occurs. You need to set them from your overrides in the code editor.
- OnClick
- OnTap
- OnScroll
12. Animations:
The FramerX javascript comes with a set of advanced and useful animations and that works well with the overrides to animate the frame.

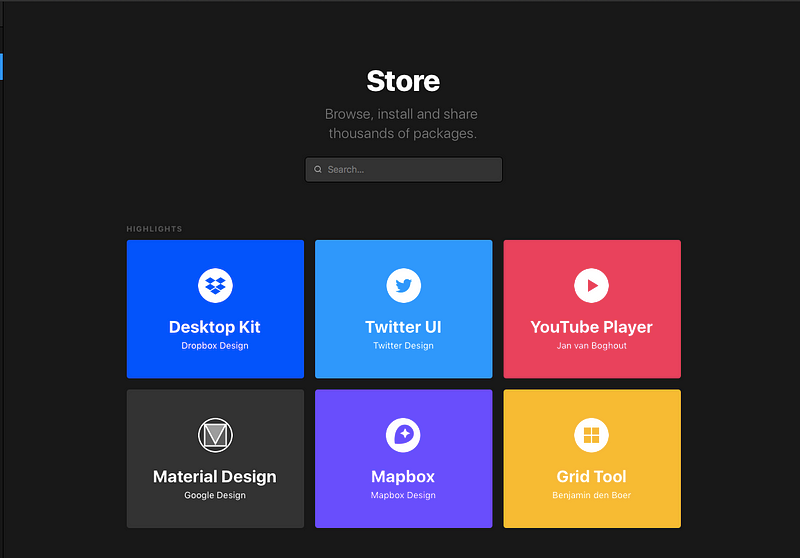
13. FramerX Store:
FramerX consists of an amazing in-app store, containing many packages created by designers for the framer Community and it can be used in your application which will definitely reduce a lot of time and effort.
These are the concepts you need to know to get started and understand the awesomeness of FramerX. FramerX will reduce a lot of time and effort happens between the designer and a developer. The Initial learning Curve may take time to get used to it and once you are on the track things will change quickly and you will see the difference.
Also, For designers out there it’s a high time to learn React in a design perspective to improve your communication between developers and also release better User Interfaces to your end-user.
Where to go from here?
- https://designcode.io/framer-x-course — Designcode.io — Free — To learn more about the FramerX and it’s React code components this is the course you need to continue from here.
- React for designers course — Designcode.io — $15/month — Have set of wonderful courses well crafted for beginners who need to get into the world of React.
- https://learnreact.design/ — $79 — This is an amazing course to get deeper into the React in a designer way. Well-organized course modules.
- https://reactfordesigners.com/ — This is a go-to guide to where you need to start. Have a look at it.
- https://reactjs.org/— To know all about react and it’s awesomeness. Then this is the place to start.
- https://reactjs.org/docs/thinking-in-react.html — These document will train you to think in the react way. Seeing things in the react perspective to solve the problems