


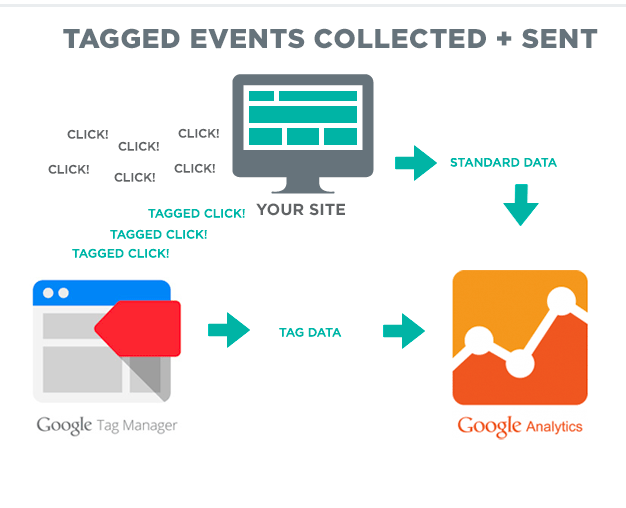
3,486,492 live websites using Google Tag Manager. GTM lets you add and update website tags without changes to underlying website code. It leads to understanding your audience better and serve them in a better way.

For example, you can analyse what are key aspects of your site that is attracting the user most and which have become obsolete such that a user never visits.
But collecting data is a complicated process since it needs to find an algorithm to suit your specific needs. And they are also a bit complicated to set up as your site grows exponentially. Here comes the subject of this article today, the Google Tag Manager
What is Google Tag Manager?
In simple terms, the Google Tag Manager is a tag management system. Digging a bit deeper, tags are a bit of programming code which you embed in the JavaScript or HTML section of your site in order to perform various tasks. You could create different tags for a different purpose.
For example, you might create a tag to check how many people are filling up a particular form on your website in a particular section. This will give you an idea about how much people may be interested in enrolling or such activities.
There are many advantages of Google Tag Manager which will be discussed in the next section. But one of the most important factors regarding Google Tag Manager that needs to be mention is that it removes the redundancy of writing the same code each time you have to write the same code.
It does eliminate the manual labour which ultimately reduces the probability of human error. Hence, Google Tag Manager not only have the potential to save time, but it also has the capacity to lessen the headache that may occur during the debug of the website and its function.
Why should you use Google Tag Manager?
Tagging becomes complicated as the size of the site becomes larger and more complicated. There will be updates to the codes along with new additions and executions. If all these tags aren’t managed properly, ultimately it will slow down your site and rather than being adding something benefits to the site, it will actually harm it.
Hence, you will need a tag management software which will help you in maintaining these tags.
There are many benefits of using Google tag manager:
- Easy to use: Google Tag Manager enables you to write and update new tags very quickly and it will reflect on the entire site where these tags are used. Hence, it saves time and you won’t need to write the codes repeatedly. It also makes the code easier to deploy.
- Easier to push updates: with Google Tag Manager, it is easier to push the updates and the changes will be reflected on the whole site.
- Version Control: It is also one of the important aspects of Google tag manager where after publishing a change, you can revert back to the previous one for any reason. Hence, it will make debugging much easier than having to replace the whole code again.
- Permission management: The permission system in Google Tag Manager makes it easier to control which user has the proper authority to make changes to the site such as adding new tags or macros etc.
- Built-in tags: For the functions which are basic and common to most of the site, there are built-in tags for it and you won’t need to start from scratch. Adwords conversion, universal analytics to name a few are the built-in tags that you will find in Google Tag Manager.
- Google analytics: Google Tag Manager also allows you to add implement Google Analytics which has all the options that you would mostly need.
Step by Step Google Tag Manager Tutorial:
- The first step in order to use Google Tag Manager is to, you have to set up an account. Though Google Tag Manager is also from Google, your existing Google account won’t be considered here and you have to set up a new one for this platform.
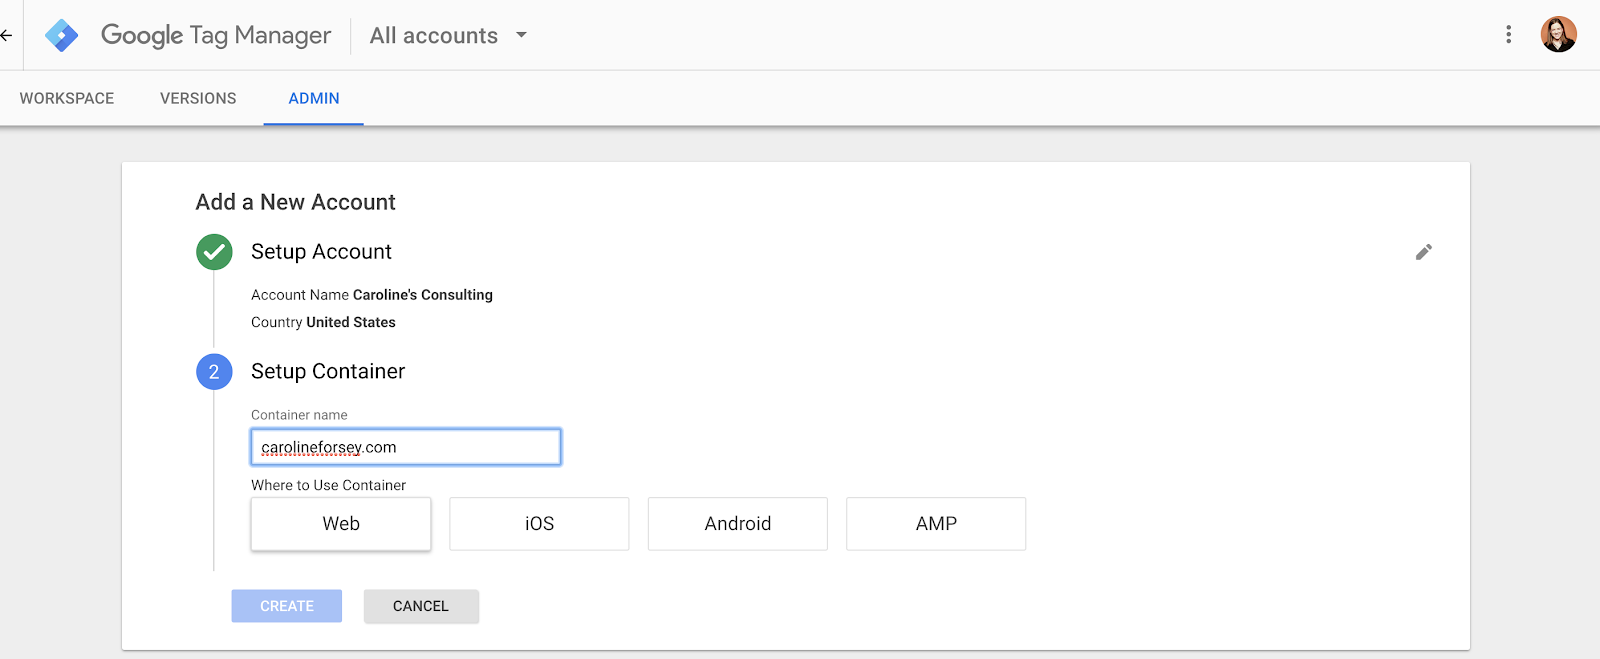
- Browse to https://www.google.com/analytics/tag-manager and click the “start for free” button in order to set up an account. You will be asked to input various information such as account name, country, your website address along with for which platform you want to set up the Google Tag Manager options being: Web, ios, Android and AMP. You should put the necessary information in the boxes and click continue.
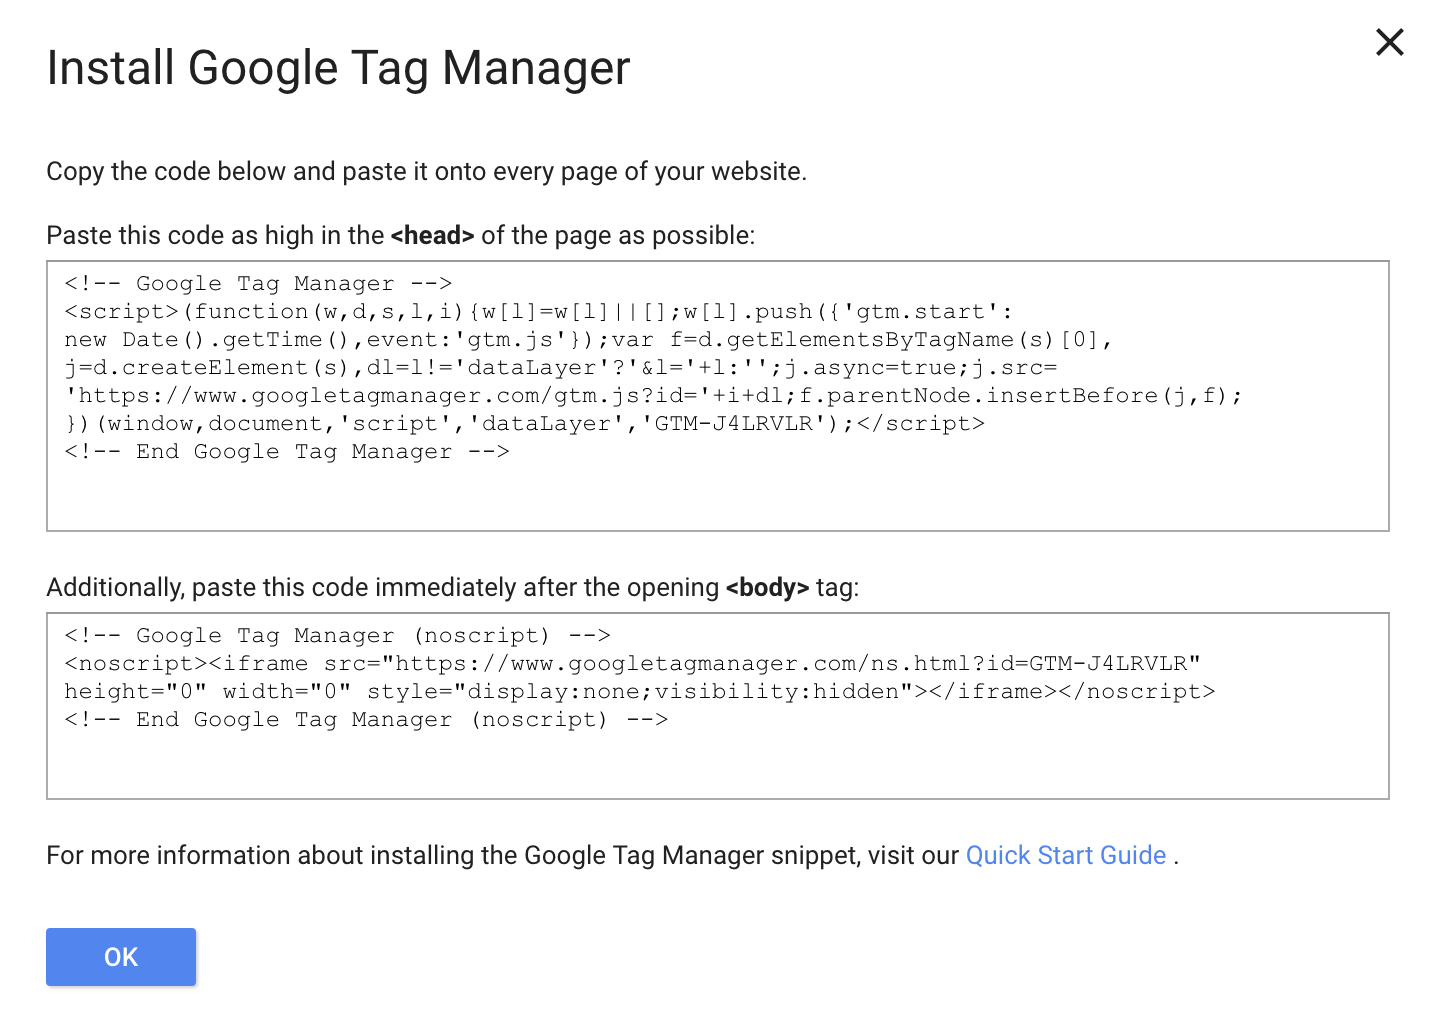
- After submitting, you’ll be greeted with some codes which you’ll have to put in your page in appropriate sections. There are codes which should be put in the <head> section and there are codes which should be put in the <body> section of the HTML. Thus, Google Tag Manager is set up and it is time to set up tags which can be used.
- Before starting to use tags, one should follow a naming convention so that it will be easier to identify its purpose by just looking at the name. For example, Google recommends the following convention: tag type – the name of the app – detail. A perfect example could be, “Google Analytics – iOS – About us page”. Thus, you could manage the tags more efficiently if you follow a naming convention which will help you later on.
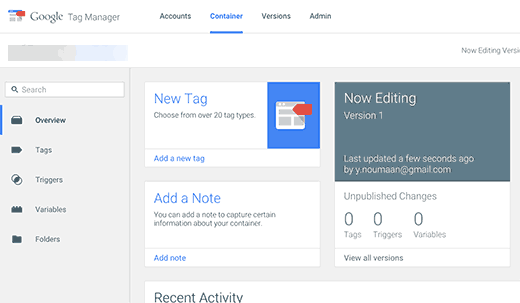
- Within the Google Tag Manager, the dashboard contains “New Tag” button. Click it.
- You should change the title of your tag and click configuration. You’ll have multiple options on the sliding pan on the right side. Choose the appropriate one for you.
- Depending upon the tag type you will choose, you’ll have to enter different input which will be required by the Google Tag Manager.
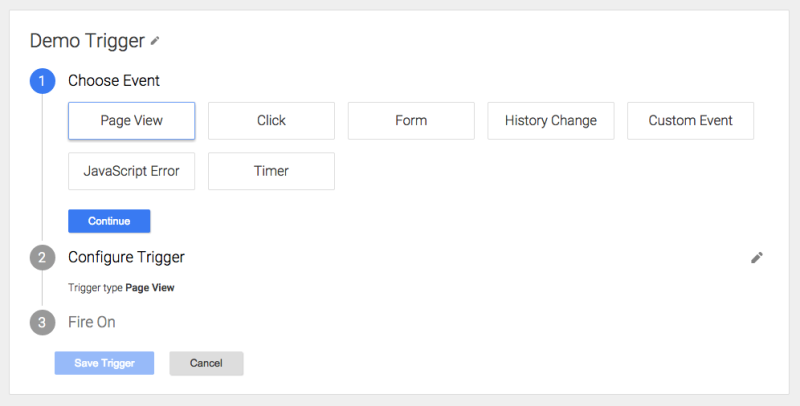
- Next will be the “triggering”. A trigger is when you want the tag to be recorded. These triggers will vary depending upon what purpose you will use it for.

- When everything is done, and you are satisfied with the options, click the save button to continue.
- Next, click the submit button which will bring you to the publish option. There are two options: “Publish and create version” and “create version”. If you are ready to publish the tags to your page, then click the former option or otherwise, you should check the latter option.
- Click “Publish”
- Next, you’ll be shown the container version. You can enter a description for this version so that it will be easier to track the changes later on.
- Thus, you have created the first tag in the Google Tag Manager.
Setting up a Google tag manager with Google analytics:
After you have set up a Google Tag Manager account, it is actually very easy to set up Google Analytics.
- In the previous section, you’ve created an account in Google Manager. Go back to the dashboard of that account where you will use the “New Tag” button as you’ve done in the previous tag while creating the first tag.
- In the next page, you should rename the tag from “Untitled Tag” to something meaningful so that you’ll have a clear idea about the purpose of the tag just by looking at the name. The naming convention has already been mentioned above which was: tag type – the name of the app – detail
- In the options from tag type, choose “Universal Analytics”.
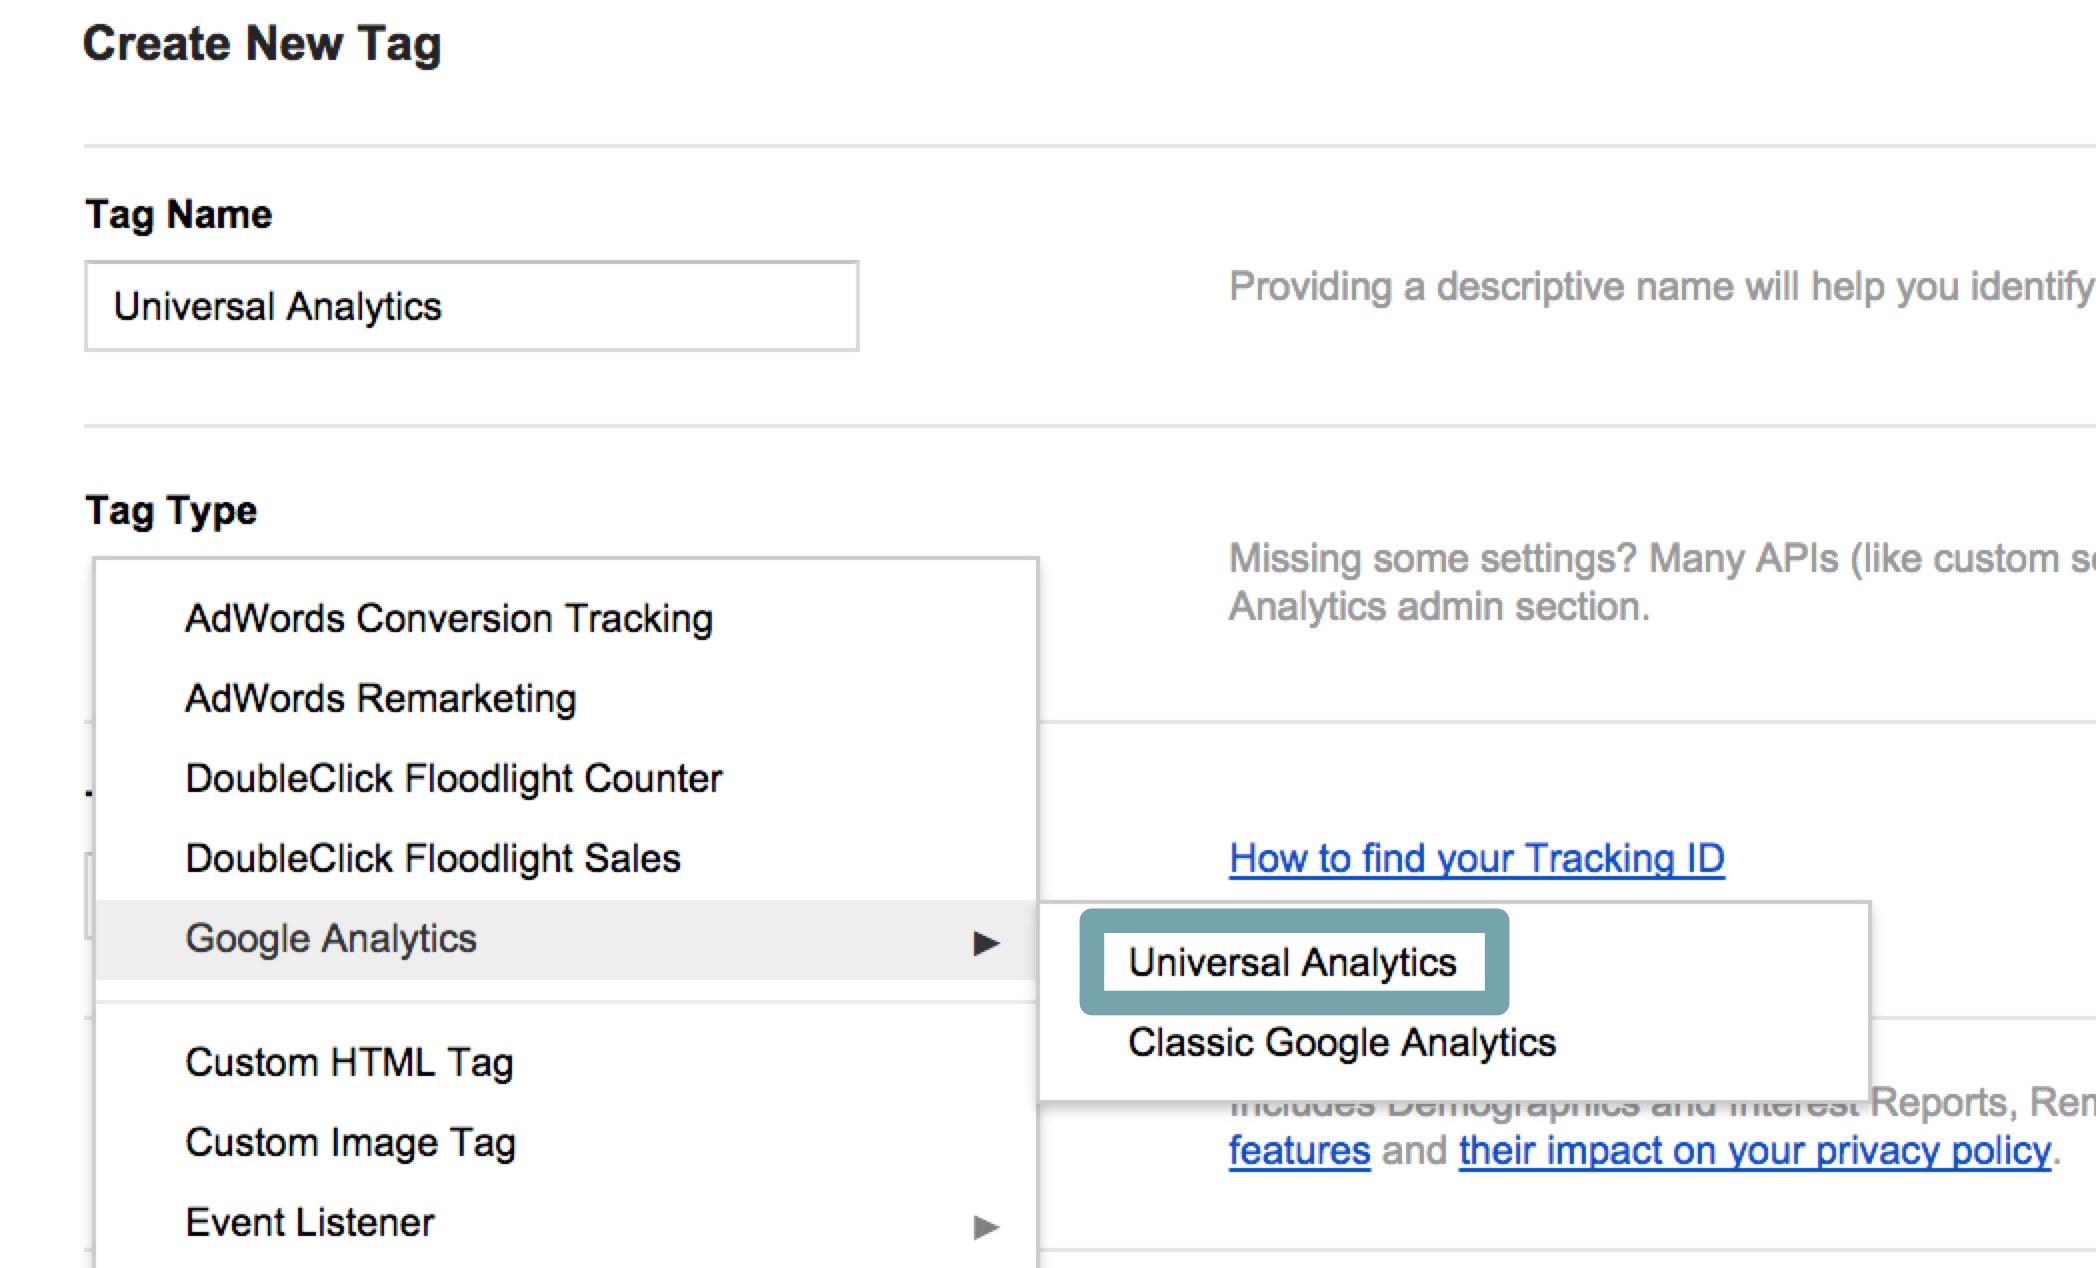
- Here you will need to put two information. One is the “Tracking ID” and the other one is, “Tracking Type”. There will be multiple options on track type. Choose the appropriate one for you.
![]()
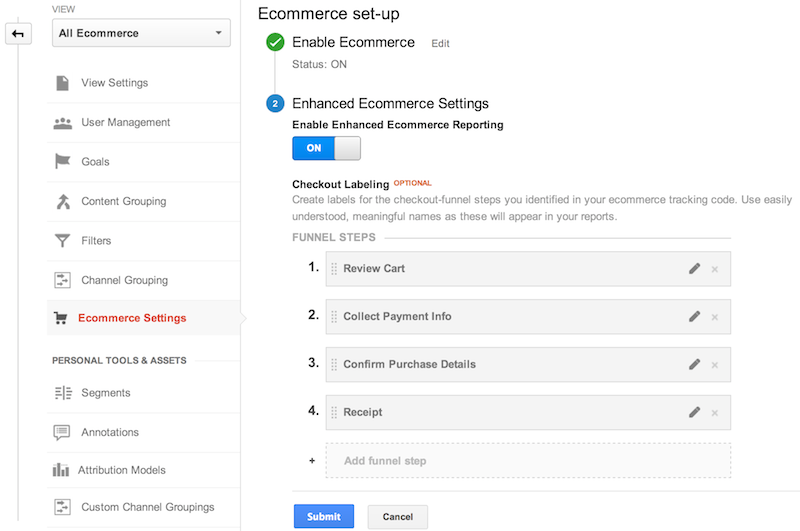
- Then choose the trigger. And click the save button to continue.
- In the next stage, you may publish the tag id you are ready, or you may just create it without publishing it for later publishing.
![]()
- Thus, you’ve finished setting up the Google Tag Manager with Google analytic.
How to do Event Tracking in Google Tag Manager
There are four main steps while planning for event tracking.
- Compiling a list of events that require need to be tracked.
- Setting up event triggers so that we can track the event.
- Setting up tags so that data from these events could be sent to some other entity for example, such as Google Analytics.

- Using the “preview” feature in Google Tag Manager so that we will be sure about the tags working perfectly in the manner that it was intended and that there are no bugs.
Coming to action:
- The first step is to enable the built-in variables which will be required later on for triggers and other purposes. You’ll find the Variable option in the left pane of the dashboard.
- Click “Configure” and select all the variables that you’ll require.
- A pre-requirement: You’ll need to have a bit of HTML background in order to perform the following. An HTML tag has different attributes such as id, class, style etc. You’ll need the attribute id in the following.
- Click on the “New Tag” on the dashboard and here you’ll create a trigger.
- There will be different trigger types in the right pane that will appear. PageView, Just links, Window Loaded will be among the options. You’ll need to choose which trigger you want to track and then setup accordingly. There will be different options for each trigger and hence, you will have to know the conditions so as to when you want it to be tracked. If you want to track related to a specific element, then you’ll have to use that id of the element in the conditionals so that it will be tracked.
- Next, you need set up the tag.
- Configure the tag with Google Analytics as it was done in the previous section. But you have to choose “events” here.
- There will be options with category, action, label etc.
- Category: overall category.
- Action: The action that will occur during the event.
- Label: additional information can be out here.
- Value: In most cases, it should be left blank unless you’ve a complex setup.
- Next click “save” and the tag is thus connected with the trigger.
- In the next step, you can use the preview button to check for the workflow during the event that you are tracking. It will show you the flow of codes.
How to add the Facebook pixel in Google Tag Manager:
It’s actually very easy to create Facebook pixel in Google Manager.
- Generate Facebook pixel in the Facebook events manager interface.
- Next, you will have to choose the platform for integration. Choose the Google Tag Manager.

- It will ask for manual or automatic installation. If you want to do a manual installation, the following will be applied.
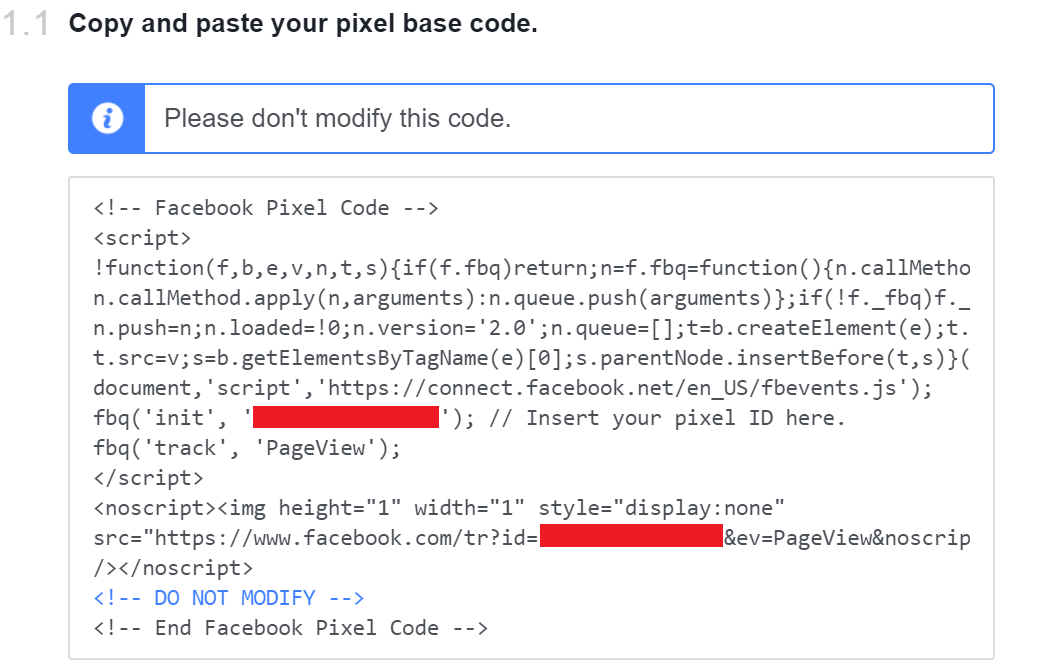
- Choose manual and you’ll be given which you have to copy and then paste it in your Google Tag.
- Create a tag with custom HTML and paste the HTML code from previous step.
- Next, you track events which will be based upon the action that will be performed by the visitors. Refer to the event tracking section for further details as it already shows you how to track events. The only difference will be, These events will be based upon events from Facebook trigger management interface and hence, in order to create the bridge, you’ll have to take another step.
- Create a custom HTML tag in GTM and paste the code that you’ll get from previous step.
How do I install Google Tag Manager on WordPress?
In order to install the Google Tag Manager, you’ll need to use the account that was created at the beginning of this article.
- First, you’ll need to create a new tag.
- In the tag product, you’ll find multiple options which you may include. For example, you can choose Google Analytics.
- After entering the tracking ID, you’ll need to create the trigger for which the event has to fire.
- Google Tag Manager will show you a bit of code which you’ll be pasting in WordPress.
- By using a plugin or manually editing the page in the WordPress, you’ll have to paste the code from step 4 into the footer section of your site.
- And then you can publish the tag from the Google Tag Manager.
Thus, Google Tag Manager makes it very easy to create and use tags in WordPress and as such.
How do I install Google Tag Manager on Magento:
The extensions make it easy for Magento users to implement Google Tag Manager in Magento. Via the following procedure, you can use GTM in Magento:

- Download the zip file of the extension, for example, https://www.mageplaza.com/magento-2-google-tag-manager and unzip it.
- Via FTP, copy the files to the root directory.
- Disable the cache management.
- On the command line, execute the following command: php f bin/Magento setup:upgrade
- Navigate to Stores->Configuration->Advanced->Advanced and check for the extension.
- Then go to Google Tag Manager->Settings and put the code which you have gotten when you created the Google Tag Manager account into the Google Tag ID field.
- Save it and refresh the cache.
- Next, you can configure the tag which already been described at the beginning of this article.
How to get rid of Google Tag Manager:
There isn’t a one-click solution to get rid of Google Tag Manager. You could try a different way to remove GTM out of which following three might yield good effect.

- Manual deletion of tags, triggers and variables: It will be a bit of time-consuming process and that too may contain human errors which are unavoidable.

- Restoring the 1st version of the container: Go to the versions in Google Tag Manager. Search for the first version and set it as the Latest version. This will restore the container to the initial stage but this isn’t foolproof idea since there may be some triggers or variables that may include in that version.
- You can import an empty container so that there won’t be any residuals which can happen method 2. There are various scripts available for this purpose and you can choose which one suits you the most.
Best Google Tag manager alternative software:
Google Tag Manager is a versatile software and it is good in what it does. But there’s also a steep learning curve involved here due to which many people may not find the comfort while using it. In this case, you should look into the other alternatives and check if it suits you the better. Especially if you are new to programming, then you should look for the ones which does the common task without going through much hassle.
Among these alternatives, www.customerlabs.co action recorder is probably one of the best alternatives that you will find. Without writing any code, you can track anything on your site from the data that is gathered, you can bring the best marketing experience for your visitors without having to go through the complicated Google Tag Manager process.