Facebook is the largest social media platform online with 2.60 billion monthly users access Facebook’s platform, a 10% increase year-over-year.
Businesses use Facebook to run advertising campaigns to bring in customers. Most businesses, use CRM to track and manage their leads and customers info up to date.
This makes it inevitable for businesses to integrate their CRM with Facebook.
Here are the steps to integrate your CRM with Facebook
1. Log in CustomerLabs > Sources
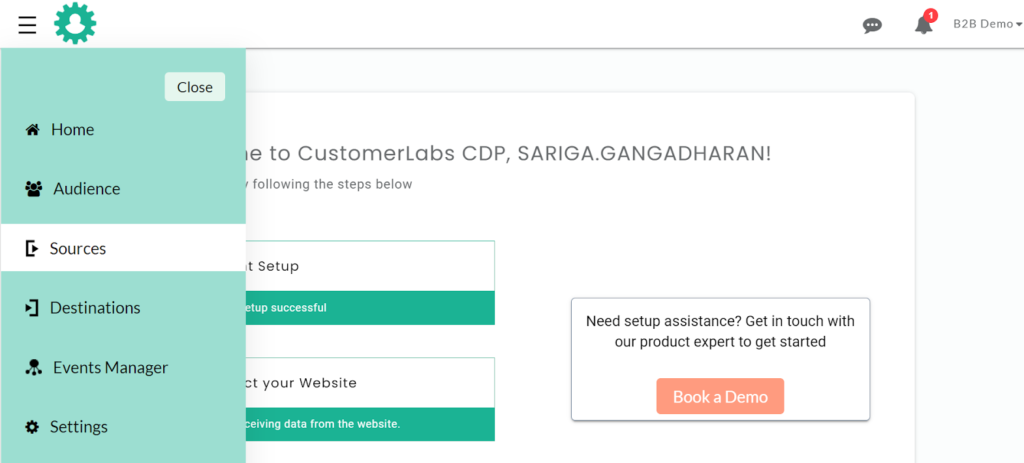
2. Select your CRM from the list of sources
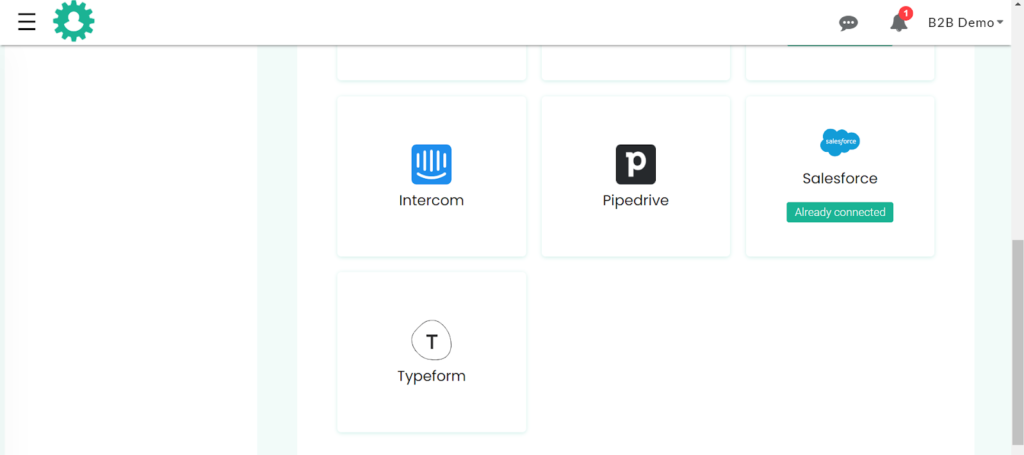
3. Click Authenticate CRM button

4. After authentication your CRM and CustomerLabs CDP are connected.
Now you have to set up the modules and choose what kind of data you want to pass to Facebook. Every CRM has its own setup module. Choose your module.
Sharing you a sample view of salesforce module
After authenticating Salesforce, select the modules and configure them to let the relevant data pass through salesforce.
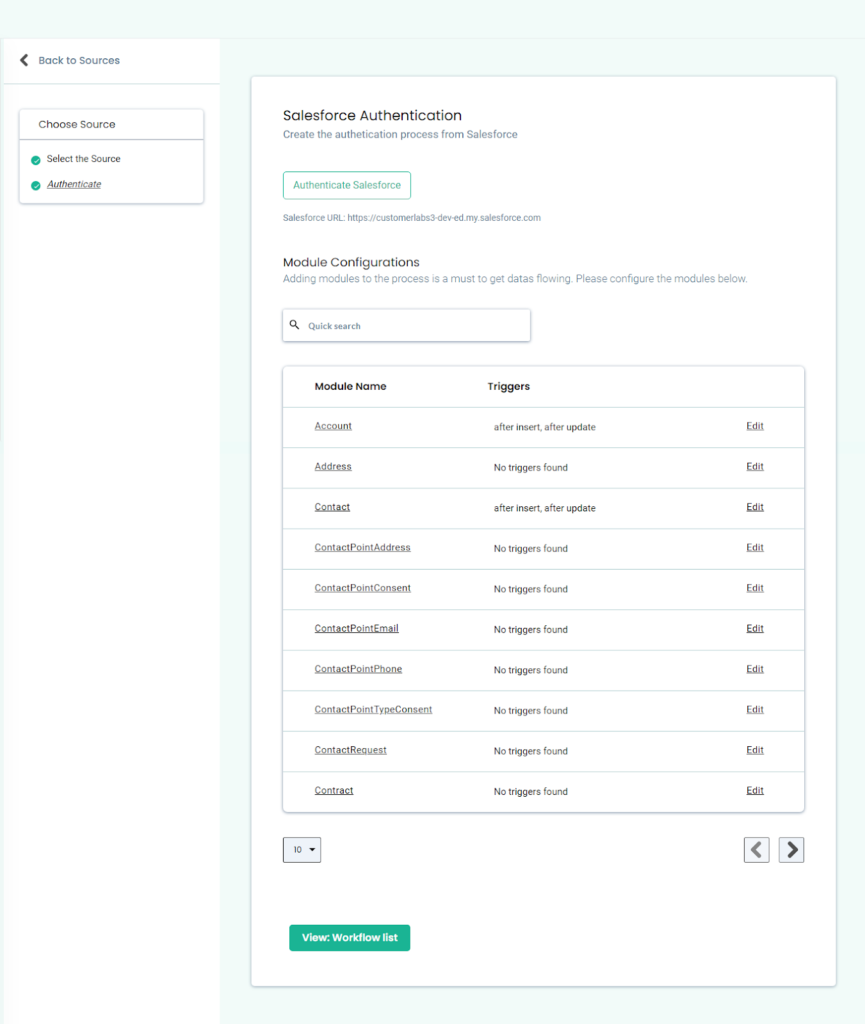
Here we have selected Account, Contact, Lead and Opportunity as modules and have configured them .
Here’s an example of Account configuration set up below
Click the account module’s edit button and select the event through which you’d like to pass the data

Likewise, configure the rest of the modules as per your requirements.
Workflow – How to send data to CustomerLabs CDP when a new contact is created in Salesforce
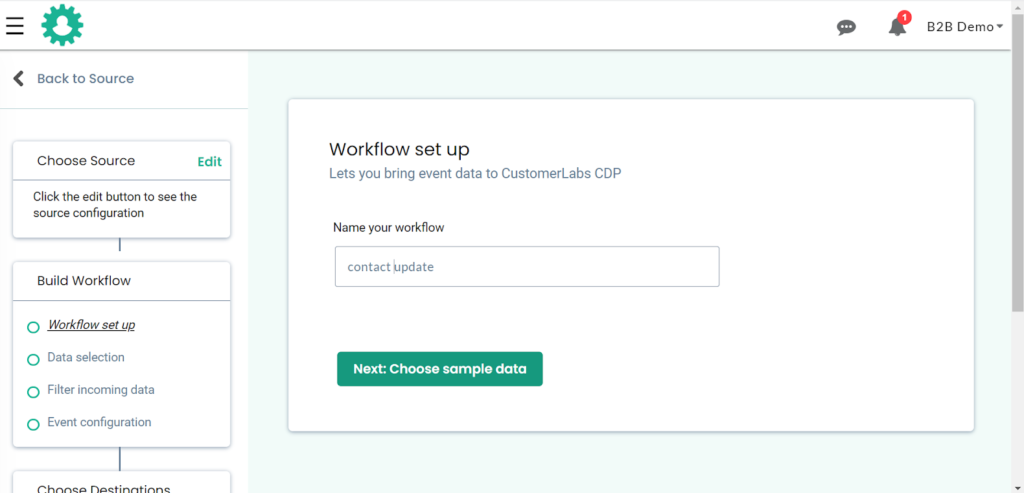
1. Give a name to your workflow and before proceeding, Create a test contact in Salesforce to get related data samples. Once a new contact is created, click on ‘Choose sample data.
2. View relevant sample data in CustomerLabs CDP.

3. Click on view data to know more about incoming information. In the case of Salesforce, all incoming contact fields will be sent in the same set. You can find only the First name, Last name, contact email here. But the common user ID parameter here will be the contact id.

4. Once the sample data is selected. Now click “Filter incoming data”

5. The filter screen acts as a roadblock to stop other non-related event data coming in from Salesforce & skew existing information
6. Click on ‘Create filter criteria’ to give your filter condition – this will allow only ‘contacts’ event from Salesforce to enter this workflow in the future.
7. Choose the event type from the dropdown

8. Add condition. Make sure to give the event name as it is shown in the sample data and click event configuration

9. Give a name to your incoming event. You can select a predefined event name as shown below or give a custom name based on your requirements.

10. User Identity mapping lets you combine all user-related events, since an incoming contact has an email address & is assigned a Salesforce ID we can select two identifiers (Identify_by_email and user_id) from the drop down and assign relevant values.

11. Click on +Add new to add the next condition.

12. Once the user mapping is done, you can categorically map other incoming information into the following buckets

13. Here we have added first name, email, and salesforce id as additional information to enrich the user profile.

Likewise you can configure other workflow data you want to share from CRM with Facebook.
Destination
1. Select destination

2. Choose Facebook from the list of destination apps

3. After enabling Facebook on the destination part
→ Copy-paste your Facebook pixel id
→ Authenticate Facebook and switch on the server-side send data.
Map the Facebook fields to improve Event Quality:
Map the Facebook fields with the data collected. This data mapping helps Facebook match the audience data sent from the server and improves your event quality score
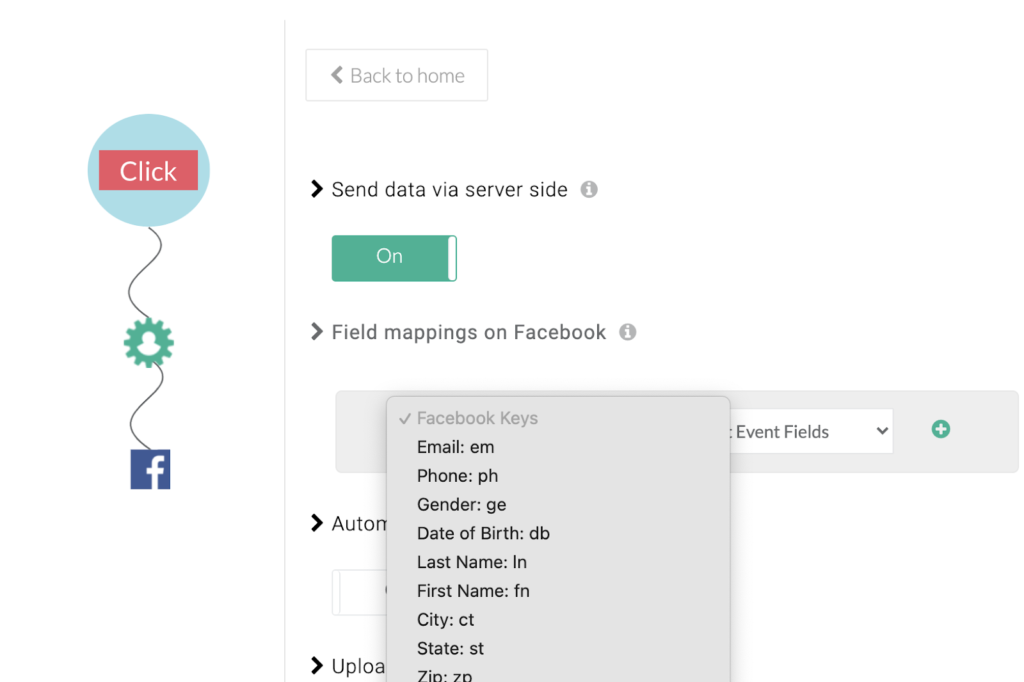
Switching off client-side and on server-side
Finally, you should switch on the event you’d like to send from the server-side. Once you do that, Facebook pixel will start receiving the data via Conversion API.

That’s it now you can seamlessly share data from your CRM to Facebook. With this set up, you can customize, segment and share your data with Facebook.
Benefits of integrating CRM and Facebook:
👉 Save time and effort by syncing CRM data with Facebook in real-time.
👉 Run personalized campaigns for prospects depending upon their CRM stages.
👉 Increased Facebook match rates increasing the overall conversion rate by 2x.
👉 Integrating your CRM with Facebook can help run Facebook lead ad campaigns efficiently
👉 Supports Facebook Conversions API helping marketers measure ad campaign performance accurately and optimize them.
CustomerLabs Supports all major CRM integrations including
👉 Integration of Salesforce with Facebook
👉 Integration of HubSpot with Facebook
👉 Integration of Pipedrive with Facebook
👉 Integration of Freshsales with Facebook
👉 Integration of Zoho CRM with Facebook
👉 Integration of Zendesk with Facebook
and a lot more…

