Customerlabs Support Docs
Explore our documentation to quickly get started
-
CDP Core Concepts
-
Destinations
- CustomerLabs + BigQuery Integration
- CustomerLabs + Facebook Custom Audiences
- CustomerLabs + Gist (ConvertFox) Integration
- CustomerLabs + Google Adwords Integration
- CustomerLabs + Google Analytics Integration
- CustomerLabs + Google Sheets Integration
- CustomerLabs + Intercom Integration
- CustomerLabs + Mixpanel Integration
- CustomerLabs + Segment Integration
- CustomerLabs + Webhooks Integration
- CustomerLabs CDP + Customer.io integration
- CustomerLabs CDP + Drip Integration
- CustomerLabs CDP + Zapier Integration
- Show all articles ( 3 ) Collapse Articles
-
Events Configuration
- Documents
-
Getting Started
-
Segmentation
-
Sources
-
Website Event Tracking
-
Changed log
Shopify Implementation Guide
Follow these steps to start tracking events from the Shopify server
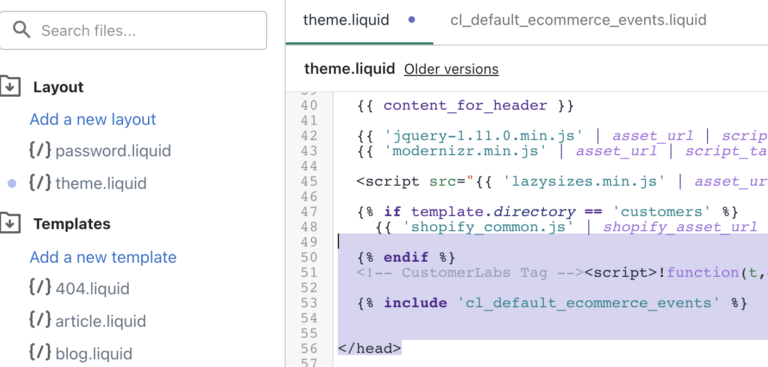
1. Copy CustomerLabs Tag and paste it under the header section in liquid.theme.
2. Login to the CustomerLabs Website, click on the events manager to copy the “tag”

3. Then go to your shopify account and click on “Online Stores” and click on actions → edit code
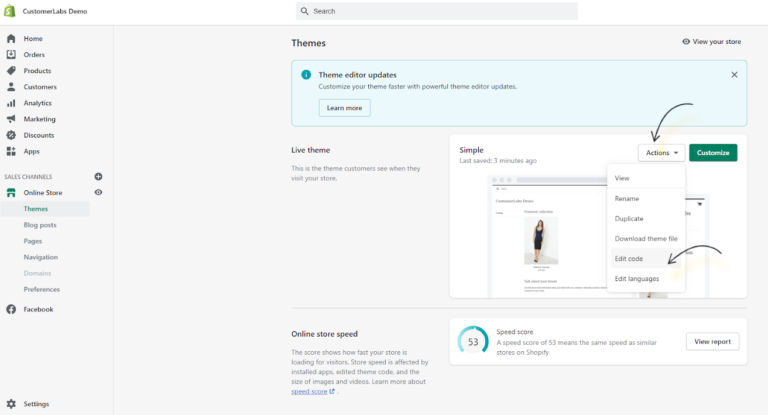
4. Then search for “/head” and paste the CustomerLabs code in the header section and save.
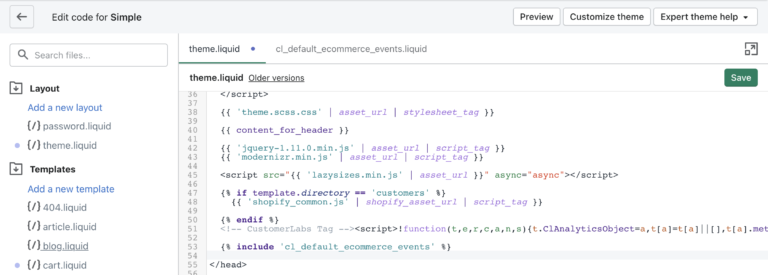
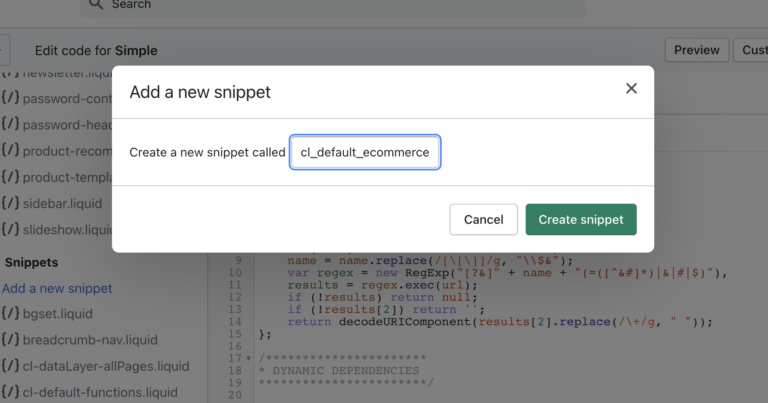
5. Create a new snippet and name it as “cl_default_ecommerce_events”
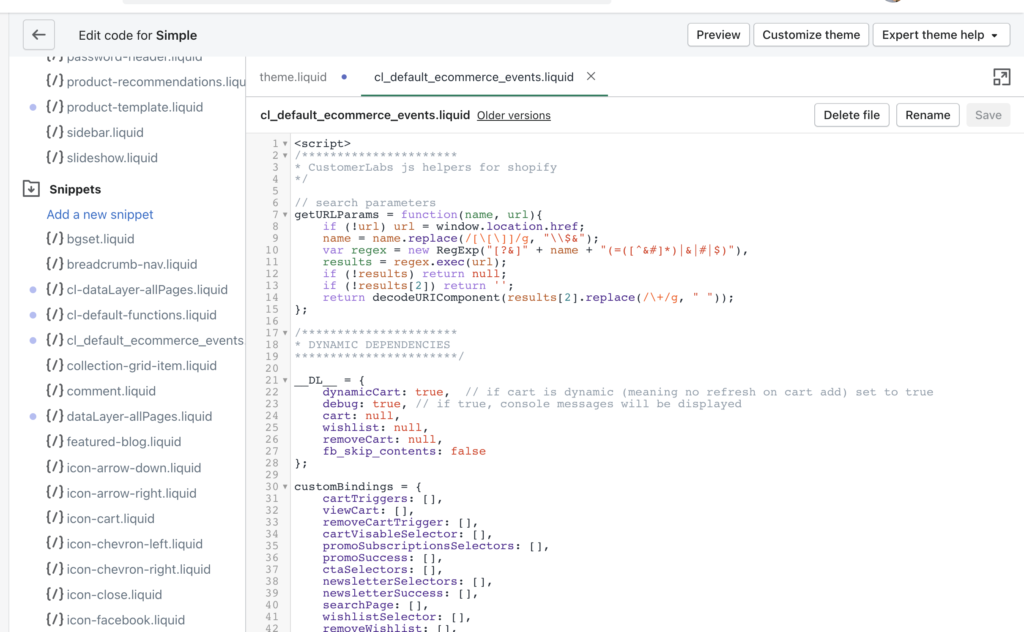
5.a. Copy the entire script from cl_default_ecommerce_events in github and paste it under the new snippet created and save them.
6. Now, copy this include tag → {% include “cl_default_ecommerce_events” %} and paste it below CustomerLabs Tag in both theme.liquid and checkout.liquid(if Shopify plus)
7. To track purchase events from the browser side, make the following changes (only if required)
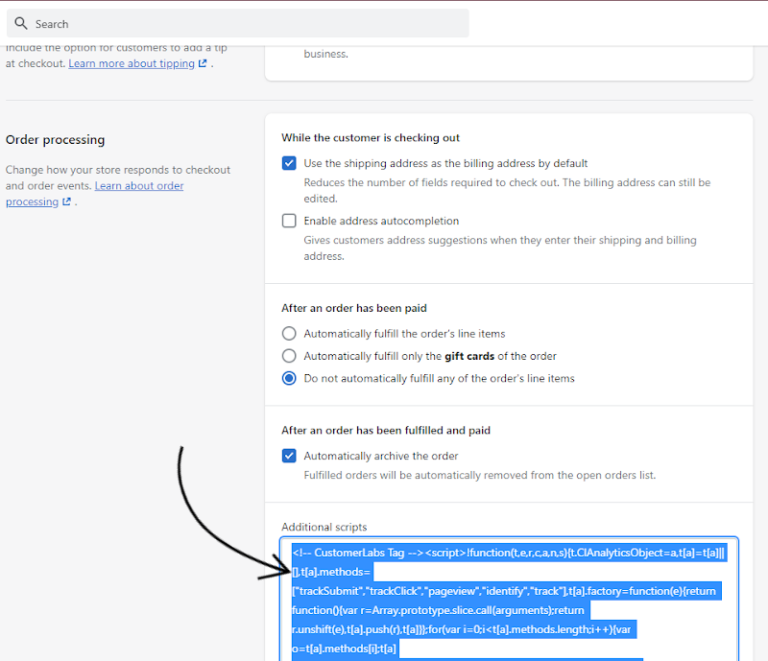
👉 Copy the CustomerLabs tag and then click on settings → checkout → order processing → additional scripts.
👉 Paste the CustomerLabs code and followed by script in Github (cl_default_ecommerce_events)” copy the entire script and paste on the additional scripts and save the action.
To track add_payment_info, make following changes (only if required)
8. Go to CustomerLabs, click on Sources → Custom source → give the source name as “Shopify Webhook” and then copy the URL
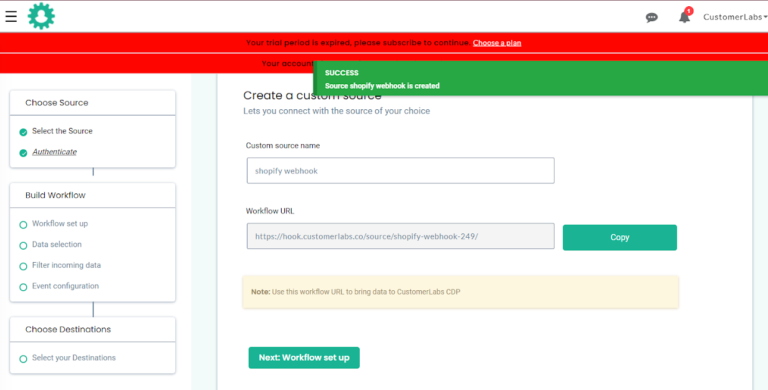
9. Now go to the Shopify store , go to settings → Notifications → Webhooks → Create a new Webhook
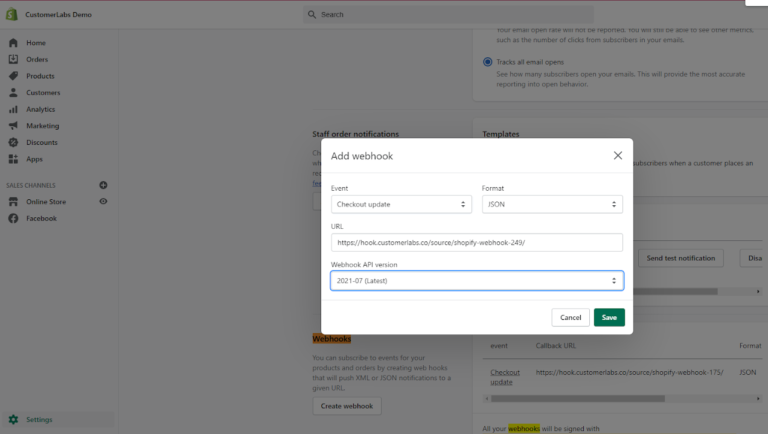
10. Now paste the URL copied
11. Select the event as “Checkouts (checkouts/update)”
12. Select format as “JSON”
13. Select version as “Latest version”
14. Save the changes.
15. And then go to the CustomerLabs, click on → I have installed code → Allow URL

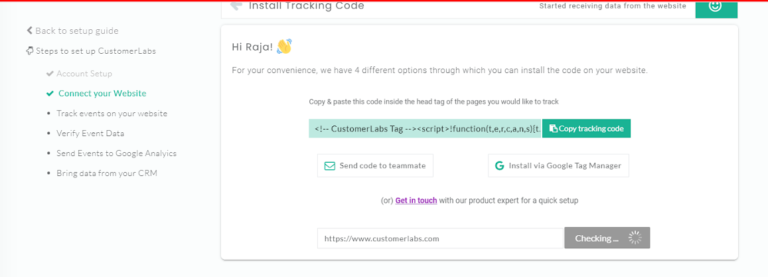

For Facebook configuration
1. Log in to CustomberLabs
2. Click on destinations and select “Facebook”
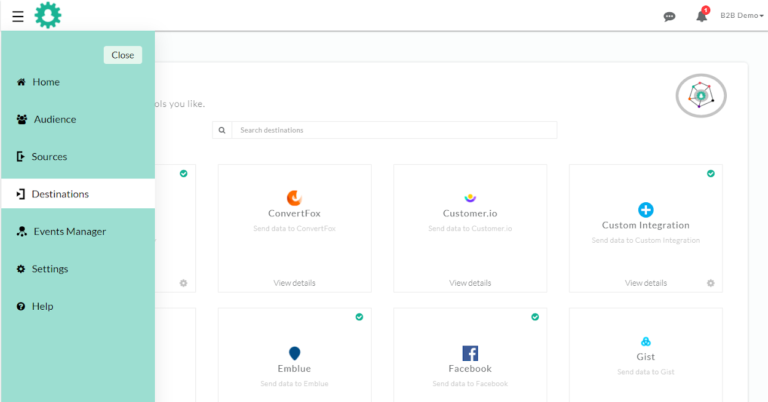
3. Copy your Facebook pixel id. And then continue with Facebook which redirects you to Facebook page.
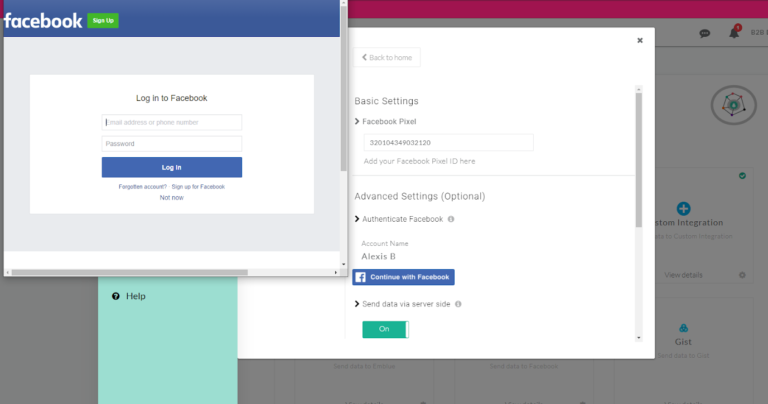
4. Authenticate Facebook and switch on the server-side send data
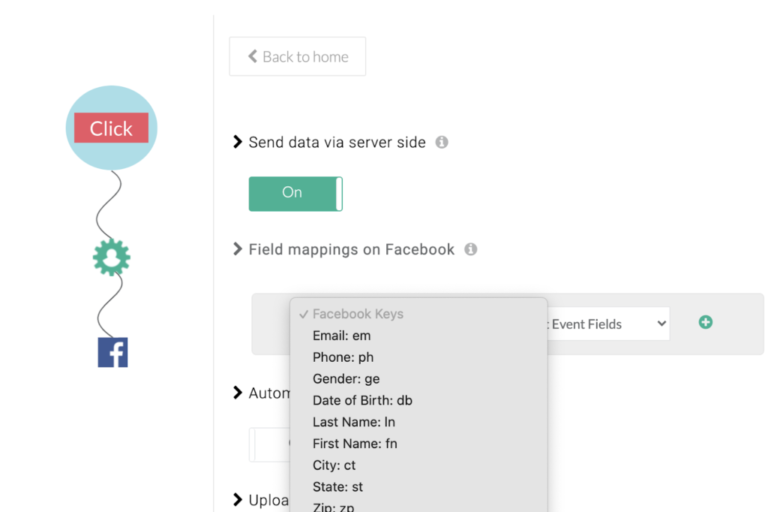
5.Now to setup the workflow → Setup Action workflow
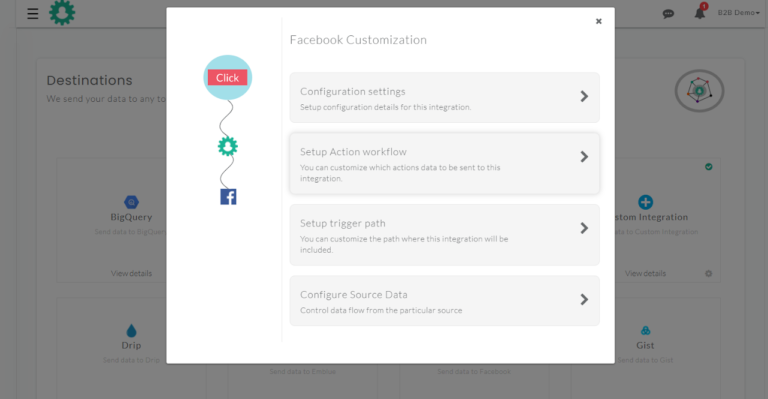
6. Click on “enable all server side callbacks”
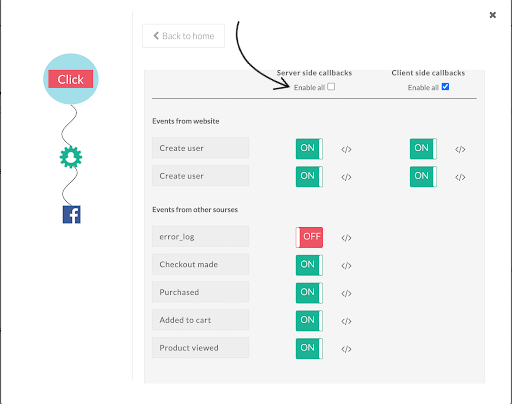
7. Now, you have to uninstall Pixel from your Shopify account to avoid sending duplicate events to Facebook.
8. Log into your Shopify account and go to Online store –> Preferences –> Facebook , where you have to remove the Pixel

9. Then, go to Facebook on your Shopify account –> Data Sharing Settings –> disable the “customer data sharing”

Just incase if you missed the steps, check out the video manual “how to uninstall Shopify and Facebook Pixel”
And yayy. You’re done!!!
